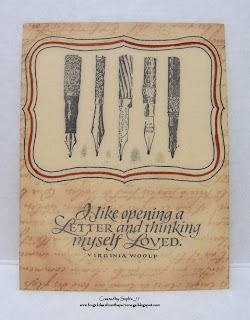
Supplies: paper (Making Memories, The Paper Company); image from recycled book; Sizzix Nouveau alphabet; McGill tab punch; composition notebook.
I had fun with this one! I had picked up this book for a little bit of nothing, and it's filled with the most gorgeous images. (It's by Karla Dornacher, who has a wonderful talent.) This cupcake stand was just begging to be made into a recipe book for my Secret Sister!
As usual, I lined the inside of the book with coordinating paper.
Since this is intended as a recipe book, I made tabs to divide it up. And since my decorative paper was flimsy, I used a file folder base for these tabs to make them more durable. I just adhered the decorative paper over the top of the file folder. I left the tabs blank so the recipient could choose her own categories.
I loved this book so much I almost didn't want to give it away!
Wednesday, September 29, 2010
cards
1 comments
I Challenge You Wednesday: Heartfelt Creations Sunflowers
This was another of my friend's purchases that she let me try out. Let me tell you, I need to get a set of these coordinating stamps and dies! I absolutely love the sunflowers!
Supplies: stamps (Heartfelt Creations); ink (SU! Chocolate Chip, BIC Mark-Its); paper (Making Memories, unknown); Nestabilities Blossom and Labels 1; MS corner punch; dark brown flock; black gingham fabric ribbon.
I thought the MS corner punch sort of looked like a sunflower, so I used it. I really, really like this one!
Size: 5-1/2 x 7-1/2".
Supplies: stamps (Hampton Arts sentiment, Heartfelt Creations sunflowers); paper (unknown, Making Memories); ik (SU Chocolate Chip); MS corner punch; CB corner die; black gingham fabric ribbon; CM circle cutter; orange rhinestones; dark brown flocking.
I've been having so much fun making lacy creations with my MS corner punches lately! I've found that once you experiment with them for a bit, it's really quite easy and fast.
See the inside of the sunflowers? I used brown flock to make them a little more realistic. It gives it more of the bumpy look I was after, and it's a really neat texture, too.
Size: 5-1/2 x 7-1/2".
Well, that's it for me this week. Now you can go check out what my friend made. Enjoy!
Supplies: stamps (Daisy Hill and Studio G alphabets); ink (white, BIC Mark-Its); paper (Making Memories, The Paper Company); composition notebook.
In addition to the spelling notebook, my son needed a seatwork notebook for homeschool. I thought this one was pretty fun, and I was glad to finally get to use that number paper! It's really cute, but it has limited uses.
At first, I couldn't think of how I wanted to embellish this one. When I hit on the chalkboard look, though, I really liked it!
I've had this idea in my head for awhile now, and this past weekend I found the perfect items to do it! You've probably seen the footed cake plates made from a dollar-store plate and candlestick. They can be quite lovely! But I had another idea ... something that I thought would look really, really fancy:
How's that? I'm not sure where I ever got the idea, but I had to have seen something similar before. After searching online for awhile, though, this is the closest I could come. (It's also the only similar one I could find.) $223?!? You've got to be kidding me! No offense, but anyone that buys that has to have a lot more money than sense.
Anyway, back to the project at hand ... If you want to make something similar, it will cost you about $4 (not including the E6000 glue). You need:
The first thing you want to do is make sure your figurines can touch somewhere, probably along the bottom. Just set them down so they form a triangle and make a note of where they touch. Put a dab of E6000 glue at each of those places and stick them together. Mine were glued where the lady's skirt touches the man's foot.
You can let that dry before moving on, but it's not necessary. I was too impatient, so I just kept going. :)
Figure out what part of the figurine your plate will rest on (i.e. the highest points). In this case, it rested on the men's heads. Put a generous dab of E6000 on that spot and carefully center your plate over the whole thing.
Let it set up, and you're in business!
I hope you enjoy this as much as I did. The possibilities are really endless. I saw some cute clear snowmen, and they'd look really cute holding up a clear glass plate. I might just make one as a Christmas gift. :)
How's that? I'm not sure where I ever got the idea, but I had to have seen something similar before. After searching online for awhile, though, this is the closest I could come. (It's also the only similar one I could find.) $223?!? You've got to be kidding me! No offense, but anyone that buys that has to have a lot more money than sense.
Anyway, back to the project at hand ... If you want to make something similar, it will cost you about $4 (not including the E6000 glue). You need:
- 3 dollar store figurines - $3
- 1 matching plate - $1
- E6000 glue - I had this on hand, and you don't need much (it's around $5 full-price at Michaels, but don't forget you can use a coupon)
The first thing you want to do is make sure your figurines can touch somewhere, probably along the bottom. Just set them down so they form a triangle and make a note of where they touch. Put a dab of E6000 glue at each of those places and stick them together. Mine were glued where the lady's skirt touches the man's foot.
You can let that dry before moving on, but it's not necessary. I was too impatient, so I just kept going. :)
Figure out what part of the figurine your plate will rest on (i.e. the highest points). In this case, it rested on the men's heads. Put a generous dab of E6000 on that spot and carefully center your plate over the whole thing.
Let it set up, and you're in business!
I hope you enjoy this as much as I did. The possibilities are really endless. I saw some cute clear snowmen, and they'd look really cute holding up a clear glass plate. I might just make one as a Christmas gift. :)
Supplies: stamps (Studio G letters and numbers); paper (Making Memories?, The Paper Company); Scrabble letter tiles; Sizzix bookplates die; mini brads; composition notebook.
My son needed a place to write his spelling list each day for homeschooling, so I decided to decorate this composition notebook to make it more fun.
The Scrabble tiles came from an old game that I picked up at a thrift store. It was missing quite a few pieces, but it was worth the $0.25 I paid for it just for the letter tiles. :)
I've had this sitting on my desk for a few weeks, trying to decide how I wanted to finish it off. When our Conference President and his wife visited, I decided to put her first initial on it and give it as is, since it's a lovely decorative file folder anyway.
Supplies: stamps (Inkadinkado letter); ink (Versamark with gold embossing powder); paper (Dollar Tree decorative file folder, unknown); off-white grograin ribbon; green glitter embossing powder; composition notebook.
I lined the inside front and back covers (as usual), using the same color that I used on the spine. It turned out quite lovely for such a simple project!
I was on a roll with the composition notebooks, so expect to see quite a few in the next few days!
Supplies: stamp (free digital image); ink: colored pencils blended with baby oil; paper (Making Memories, The Paper Company); MS corner punch; chalks
This is another free digital image I've had colored for awhile now. I simply added blue chalk to the background to make it softer, and I love the effect!
I also love how the Martha Stewart corner punch makes such neat-looking medallions. These reminded me of sunflowers.
Size: 4-1/4 x 5-1/2".
My friend picked the challenge this week, and it couldn't have been better. We were supposed to make cards with an autumn theme. I had just picked up some notecard sets from Michaels to alter, and they were autumn images. The notecards were okay, but they didn't do justice to the lovely images, so I decided to see what I could do with them.
Supplies: stamps (sentiment by Studio G); ink (Versamark with black embossing powder); paper (recycled book scrap, Michaels notecard for image, The Paper Company); silver eyelets.
Let's start with the apple bucket images. First of all, I silhouetted the image for this card. Then I went through my scraps and found this great strip of green paper that needed to be used. It worked really well, so I went from there.
Supplies: stamps (SU! sentiment); ink (Veramark with silver and black embossing powders); paper (Making Memories, The Paper Company, image from Michaels notecard); CB corner die; office brads.
For this card, I decided to see what I could do by simply cutting the image as a rectangle from the original notecard. The color is a bit "off" in the picture because those apples match the gingham quite well in real life.
One of my favorite discoveries on this card was the brads! I've made glitter brads with glittery embossing powder before, but I never tried a solid color. I'm not sure why. I guess I thought the gold of the original brad would show through, but it didn't. This worked wonderfully! I started out with regular gold office brads and successfully made them into white, black and silver brads. If I didn't tell you that they didn't originally come in that color, you'd never know.
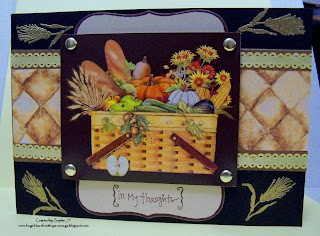
Supplies: stamps (Studio G sentiment; Michaels $1 wheat); ink (SU! Chocolate Chip, Versamark with gold embossing powder); paper (Provo Craft, The Paper Company, image from Michaels notecard); yellow picot ribbon; Nestabilities Labels 8; office brads.
I dearly love this basket and its contents!
Supplies: paper (K&Co, The Paper Company, image from Michaels notecard); off-white crocheted lace; Nestabilities Labels 8; dew drops; dimensionals.
I loved how well this paper and lace matched the image, so I kept things simple to highlight them.
Supplies: stamp (Michaels $1 bin sentiment); ink (Versamark with silver embossing powder "distressed" with black Sharpie); paper (K&Co, image from Michaels notecard); Nestabilities Labels One; CB corner die; off-white crocheted lace; leaf brad (Target $1 spot); brown ribbon.
This was the "pile it on" card of the series. I got the sentiment a little crooked, but hopefully it won't be too painfully obvious to the recipient of this card. I have since purchased a stamp positioner, so hopefully this will be the last crooked image/sentiment on my cards! :)
I had a lot of fun with this challenge. You can see what my friend did here. Enjoy!
In case you're interested, I've slashed prices (up to 50%) on the items in my Etsy shop that are expiring in the next few days.
Enjoy!
Enjoy!
I have another bright girly 'tween card to share today. This is another image from the same series as the ones I posted yesterday. Again, I've searched and can't find where these images came from, but I'm pretty sure they were online coloring pages, and I'm pretty sure they had something to do with Holly Hobbie.
Supplies: stamps (Studio G sentiment, unknown digital image); paper (Best Occasions, American Crafts); ink (BIC Mark-Its, Rubber Stampede fuschia); CM flower and circle punches; rhinestones; ribbon; Nestabilities Scallop Circles Large.
This is based on Mojo Monday Sketch 111, in case you're interested.
These bright colors are certainly not my usual, but it was a lot of fun to work with this color scheme. Besides, I think my nieces are going to like these!
I thought I'd share a few homeschool things with you today.
I've made two new file folder games with those Dollar Tree bulletin board borders.
This first one is just something to keep my daughter busy (and happy) while I teach my son. She was disappointed that there weren't more file folder games that she knew how to play right away, so I created this one to match up the lowercase and uppercase alphabet letters. In Abeka, they call them "little" and "capital" letters, which is why I wrote the directions the way I did. :)
Here is a patterning file folder game. I got the idea from File Folder Fun. They have several that you can print, but I liked the idea of saving my printer ink and just using what I had gotten a lot cheaper - these border cutouts!
In case you're not familiar with the concept of "patterning" (at least by its name), they have to decide what image comes next in the pattern. They choose from the extra matching rectangles in a pocket on the back.
I've also been having a lot of fun making large, cute images for bulletin boards and room decorations. I love Carson-Dellosa images. They're so cute and kid-friendly! I have two of their bulletin board books, and I'm set for images and bulletin boards for a few years.
This is the first set I made:
This is hanging on our wall as an incentive for good behavior. (Lest you think my kids are terrors who rarely exhibit good behavior, I took this picture shortly after I put it on the wall!) When the gumball machine is full, we're taking a trip to the local free zoo. Bonus: When it's full, I can simply take off all the gumballs and start over.
These images are a lot bigger than they look in the picture. I didn't measure them exactly, but they're around 2 feet tall.
No, I didn't freehand them, either. I used this opaque projector to enlarge them:
You can get it from Michaels for $25 (I used a 50% coupon to take it down to $12.50). They sell more expensive models, but you're paying for magnification. I only needed 5x magnification, so that's all I paid for. I think the next model goes to 10x magnification and costs $50.
I had a bit of a learning curve with this type of projector since I'm used to the regular overhead projectors, but I'm pretty comfortable with it now. I discovered the easiest way to enlarge my images was to first reduce them to the size of the viewer on the bottom - 3.25" square. If that still wasn't big enough, I'd try to make sure at least the height or width was 3.25", and it made it a lot easier to "piece" the images together as I traced.
I've been making quite a few visuals lately, so stay tuned for future posts when those bulletin boards (and other decorations) make their way into our classroom! :)
My husband and I made a trip to Dover last Monday. While we were there, I hoped to visit a few craft stores that we don't have here. I wanted to get a Bind It All from AC Moore and a set of Nestabilities from JoAnn Fabrics (or AC Moore) since I had a really great 50% coupon and saved up some money for them.
Would you believe that they didn't have either one? I was so disappointed! I thought for sure they would have them in such a big city, but no, they didn't even have shelf tags for the Bind It All. AC Moore had a shelf tag for the Nesties I wanted, but they were out of stock (as they have been every other time I've visited their stores). JoAnn Fabrics was a HUGE disappointment in all respects. Oh well. At least they still carry fabric, right?
So I came home and decided to get serious about Ebay and a Bind It All. I was hoping to get one for about what I would have paid with a 50% coupon at AC Moore, but I wasn't holding my breath because you always have to figure in shipping when you buy from Ebay. I was pleasantly surprised, and I was able to buy this one for slightly less than I would have paid at the store (even factoring in the shipping cost):
It's not the latest version, but several people told me that the original is just as good as the 2.0. Since I got the best deal on the original, I decided I wasn't going to pay twice as much for the color pink and a few features I can work around.
If you've never seen a Bind It All in person, you might be as shocked as I was when I pulled it out of the box. It's small! But that's a good thing, because the last thing I need is a huge tool to take up lots of space in my craft room. I have very small hands, and I can hold it in one hand outstretched. It's only about three pounds, so it's not the monstrosity that my comb binding machine is, either.
I really, really like it and can't wait to make something with it!
I've been busy using up images I colored nearly a year ago. Unfortunately, that sometimes means that I can't remember where I found the images. (When I first started collecting digital images, I didn't realize the importance of this.) I've searched for these, but I can't locate them. I'm pretty sure they're Holly Hobbie coloring pages, so you might try searching for that, if you're interested.
As I was designing these cards, I kept my 12-year-old niece in mind and tried to think about what she would like on a card. And these cards are the result:
Supplies: stamps (Cloud 9 Designs, unknown digital image); paper (American Crafts, unknown orange); ink (BIC Mark-Its, SU! Night of Navy); Nestabilities Labels 8; Swiss Dots CB embossing folder; rhinestones.
These are based on the MOJO91 sketch.
Enjoy!
I used an anchor with this quote because I thought it symbolized how our hope can be anchored in God. I also chose the tiny maps since we often think of maps guiding us.
Supplies: free digital stamps (Elegant Word Art by Bethany, Fun Draw), paper (ATD Travel, The Paper Company); Nestabilities Labels 8; brown chalk; brown marker.
This Word Art is from Elegant Word Art by Bethany, and I simply paired it with some free clip art from Fun Draw.
Enjoy!
Supplies: free digital stamps (Elegant Word Art by Bethany, Fun Draw), paper (ATD Travel, The Paper Company); Nestabilities Labels 8; brown chalk; brown marker.
This Word Art is from Elegant Word Art by Bethany, and I simply paired it with some free clip art from Fun Draw.
Enjoy!
My friend got this really neat PSX sewing stamp at a thrift store. She knew that I love to sew, so she let me stamp a few images to play with. I decided this would be a good challenge - what can you do with that image?
Supplies: stamp (PSX); ink (Versamark with black embossing powder, BIC Mark-Its); paper (Dollar Tree mini file folder, The Paper Company); Nestabilities Labels 1; sheer ribbon; buttons.
Since the image was predominantly black (because of the embossing powder and the fact that it's supposed to be an antique sewing machine), I chose to accent it with red. I've always thought red/black/white were a lovely combination.
I added some faux stitching around the edges, in honor of the sewing theme.
Size: 4-1/4 x 5-1/2"
Supplies: stamps (PSX, Studio G sentiment); ink (Versamark with black embossing powder, BIC Mark-Its); paper (Making Memories, The Paper Company); Nestabilities Labels 8; Sizzix Sizzlets tags; red grosgrain ribbon; buttons; pearl stick pins.
I went with the same color scheme this time, only it's off-white and kraft this time instead of white. I colored the image exactly the same and simply added a few more details to the card. I experimented quite a bit with this one, and I really liked how it turned out!
The buttons, faux stitching, ribbon and stick pins are all a nod to the sewing theme.
Size: 5-1/2 x 7-1/2".
To see what my friend came up with this week, check out her blog. Enjoy!
These old-fashioned ladies were giveaways on the Two for Tuesday blog awhile back. Since I love this style, I printed and colored a few. I was stumped what to do next, so I set them aside. Just recently I saw them again, and inspiration struck:
I used the Versamark and chalk technique to make the white background less stark:
See those fancy corners? I made them with a corner punch. Here's how:
F
irst of all, make a square medallion with a corner punch. Then cut them in half as shown above.
Next, trim along the inside to match the rest of the shape.
Lastly, cut off the little pieces that protrude and make it look unfinished. Then all you have to do is glue them down! (I used a liquid glue similar to Mono Multi.)
Remember those Dollar Tree bulletin board borders I got a few weeks ago to cut up for file folder games? Well, I finally have some pictures to show you of the first mini folder I made with them.
This is a mini file folder from Dollar Tree, sized to hold 4x6" recipe cards. I used one of the cut-outs on the front to label the game.
Inside are two pockets (also from Dollar Tree) labeled "Rhyme" and "Don't Rhyme." I put two words each on 12 cutouts. If the words on the cutout rhyme with each other, the child puts it into the "Rhyme" pocket. If the words on the cutout don't rhyme with each other, he puts it into the "Don't Rhyme" pocket.
It's easy to check your child's work on this. Just tell them to leave the cards in the pockets, and then you can go back through later and see how they did.
To store the cutouts, you just shuffle them well and then place them into one of the pockets.
I'd love to see any homemade file folder games you come up with!
This hydrangea is one of my favorite digital images, and the artist paired it with a lovely sentiment in honor of her grandmother's death awhile back. I can't for the life of me remember who the artist is, but please chime in if you know because I like to give credit where it's due.
Supplies: (free digital sentiment, unknown from SCS); paper (Provo Craft); ink (BIC Mark-Its); MS doily lace border punch; paper doily.
The sentiment and flower come on the same digital image, and I was originally planning to use it that way. But then I got the idea to cut around the hydrangea, and I really, really like the effect. This is so pretty and feminine - it's exactly what I was going for. It might not be the "norm" for a sympathy card, but I think it conveys a sense of peace and dignity.
I loved this digi stamp from the moment I laid eyes on her! Some little girl is going to enjoy receiving this card about as much as I enjoyed making it.
Supplies: stamp (unknown digital stamp); paper (American Crafts, Making Memories); ink (BIC Mark-Its); paper doily; ribbon (unknown); Nestabilities Labels 8.
Since this is another of the images I've had colored for nearly a year, I can't remember who the designer is. I have quite the collection of digital stamps, and I can't seem to find it on my flash drive where I store them all. If you happen to know the name of the company, please let me know so I can credit them for this adorable image (and so I can find it on my flash drive to print some more).
My friend picked our first Wednesday challenge of the new schoolyear: Make a card with only one layer, no dimension. Boy, was this a hard challenge! I'm a layers girl, especially since I like using my BIC markers, which will bleed through most papers. I'm not sure that these are my favorite cards of all time, but I was pleased enough to post them! :)
Supplies: stamps (Inkadinkado, PSX sentiment; SU! Script background); ink (black, Versamark with chalk); Nestabilities Labels 8.
I used the embossing-only technique with the Nestabilities on this one. I had never had success with it before, but I discovered that (at least for me), it makes a difference which way you put it into the machine. I had always put it facing up because it was easiest to keep in place, but it always cut through my cardstock. When I put it facing down (didn't change the "sandwich" at all), it worked perfectly. Is that strange or what??
Supplies: stamps (Inkadinkado); ink (Versamark with black and Stardust embossing powders).
I love the damask stamp, the sentiment and the sparkle, but this card doesn't really thrill me that much. It needs something else ... which I expect is layers! ;) I'm keeping it "as is," though, because I'm not going to cheat!!
Now you'll want to go check out what my friend made for this week's challenge. Enjoy!
I've been hoarding this floral paper scrap for a long time. I hate to use the last piece of my favorite papers, but I really need to force myself to do it. They get wrinkled in my scrap box if they're there for two years, and no one can enjoy them in the scrap box anyway.
So I pulled out a few papers and got to work creating this card that I dearly love:
Supplies: stamps (rose unknown from my friend, Fiskars sentiment); paper (Anna Griffin, unknown); ink (SU! Rose Romance); MS PATP Iron Gate Fence border punch; Nestabilities Scallop Circles Large; pink pearl dimensional paint; dimensionals; hot glue pearls; silk flower leaves.
I needed to replenish my masculine birthday card stash, as well as reduce some of my paper stash. I managed to kill two birds with one stone on this card (which ended up being an identical set of eight):
Supplies: stamps (Tim Holtz); paper (ATD, The Paper Company); ink (Versamark with clear embossing powder, SU! Chocolate Chip); ribbon (Michaels).
I've been working through my stash of pre-colored images lately. I went on a coloring binge almost a year ago, but I got zero inspiration for using any of them until just recently.
This dog is a freebie from Arthur's Free Clip Art, if I remember correctly:
Supplies: stamps (clip art from Arthur's Free Clip Art, sentiment by Studio G); paper (Sandy Lion, The Paper Company, unknown orange); ink (BIC Mark-Its, SU! Night of Navy); Nestabilities Labels 8; dimensionals; sewing thread.
I wanted to make the sentiment look like a sign around the dog's neck, so I added sewing thread and popped it up on dimensionals. It turned out exactly like I wanted it!
This is going into my boys' birthday card stash.
Look what my soon-to-be-5-year-old daughter did in school today:
Yep, that's cross-stitch done on shelf-liner paper, and she did all but the top row of the capital "I" by herself. (I showed her how to do it on the top row, and then just watched and guided her when she asked, as she finished it.)
We're studying "I,i" this week, so I wanted to do some projects that went along with it. That's when I remembered the idea of cross-stitching with yarn on this shelf paper. It was featured on another blog, but I can't remember which it was (either Filth Wizardry or Dollar Store Crafts, I think).
To prepare, I just drew x's with permanent marker in the shape of a capital "I" and lowercase "i". She used a plastic, blunt needle, and I threaded it for her. Other than that, it's honest-to-goodness cross-stitch, and I'm completely blown away at how quickly she got the idea.
She was pretty proud of herself, and so was I! :)
I'm an old-fashioned girl to the core, so I loved this cameo-style image as soon as I saw it. I've had her colored for months now, but I just couldn't get any inspiration to make it into a card ... until recently.
Supplies: stamp (digital image from Two for Tuesday); ink (Versamark with chalkds, BIC Mark-Its); paper (The Paper Company); MS Gothic Arches corner punch; Kassie's Brocade CB embossing folder; improvised glimmer mist; dimensional pearl paint.
When I got this Martha Stewart punch on clearance (Gothic Arches??), I started playing around with it and came up with these lacy pieces. Here's how I put this card together:
First of all, I made a piece like this, using Becca's right angle punching technique. I forgot to take a picture of it before I cut it in half, so just pretend it's not already cut in half. :)
Then I made four small "medallions" with the same punch, using the first part of Becca's right angle punching technique. Then I cut the larger piece in half lengthwise:
To piece the lacy part behind the image, I first placed those cut halves where I wanted them. I tried to eyeball it to give me enough room to place medallions between them and look almost seamless:
Then I added a medallion to the top and bottom of the cut-out (still behind the actual image), as indicated by the arrows:
Lastly, I added the remaining two medallions to the sides (this time overlapping the front of the image), popping them up on dimensionals:
I really liked the effect!
Supplies: stamp (digital image from Two for Tuesday); ink (Versamark with chalkds, BIC Mark-Its); paper (The Paper Company); MS Gothic Arches corner punch; Kassie's Brocade CB embossing folder; improvised glimmer mist; dimensional pearl paint.
When I got this Martha Stewart punch on clearance (Gothic Arches??), I started playing around with it and came up with these lacy pieces. Here's how I put this card together:
First of all, I made a piece like this, using Becca's right angle punching technique. I forgot to take a picture of it before I cut it in half, so just pretend it's not already cut in half. :)
Then I made four small "medallions" with the same punch, using the first part of Becca's right angle punching technique. Then I cut the larger piece in half lengthwise:
To piece the lacy part behind the image, I first placed those cut halves where I wanted them. I tried to eyeball it to give me enough room to place medallions between them and look almost seamless:
Then I added a medallion to the top and bottom of the cut-out (still behind the actual image), as indicated by the arrows:
Lastly, I added the remaining two medallions to the sides (this time overlapping the front of the image), popping them up on dimensionals:
I really liked the effect!
Subscribe to:
Posts (Atom)