 |
| Details: mini educational posters from a Google search, functional blackboard from a roll of sticky-back blackboard paper, sentence strips from an old handwriting book (Abeka) |
We started our new homeschool year this week, and I've been very busy. You see, I was getting
two classrooms ready for a new year - ours and the dolls'.
 |
| Details: mini educational posters from a Google search, functional white board from a roll of sticky-back white board paper, sentence strips from an old handwriting textbook (Abeka) |
I've been planning the dolls' classroom for months. My kids picked up a copy of American Girl's book,
Doll School,
at a thrift store and pored over it for days. They did a few of the activities themselves, but I looked through it and immediately envisioned all the possibilities for creativity.
 |
| Details: mini maps from a Google search, Washington and Lincoln pictures from older Target Dollar Spot flashcards, sentence strips from an old handwriting textbook (Abeka) |
This was my back-to-school gift for my kids just because they're great kids ... and to offset the fact that we didn't have any of the "new clothes, new everything" hoopla that other kids have on their first day of school. (Not that they've ever hinted that they miss that, but I knew it would make the day extra-special.)
I had my husband set this up in the living room when we went over to the church (where our classroom is located) in the morning. After we were all done for the day, this was waiting for them to discover it.
Let's take a look at the details ...
 |
| Pants by Springfield, everything else was handmade by me |
These are Alex's new back-to-school clothes. I can't begin to tell you how thrilled my son was with these clothes. Even I was surprised at how pleased he was, and I know him better than anyone. Not shown: real boyish underwear!
I made the black shoes from black canvas material leftover from the black dress pants I made for him. I haven't given him the black pants yet.
The pants came from Springfield. I bought them before I realized how easy it is to sew these things.
I made the polo shirt from a free Liberty Jane pattern. It's not perfect, but by allowing the shirt front to stay open a bit like I did, you can't even tell. My son
loved the shirt. He said it was "perfect". I knew better, but I wasn't going to tell ... ;)
I handknit the v-neck cardigan using a ball of sock yarn that I picked up for its gorgeous color scheme. I've hung onto it for almost a year now, trying to figure out what would best showcase it. This was the winning project, and I'm very pleased with how it turned out.
As a side note, this was my very first time to do steeking. I did it on the armholes so the self-striping wouldn't get messed up. I was nervous doing it, but it worked perfectly. You know what? It's really easy, too!
 |
| Bags: Dollar Tree; box: vintage Sears box, given to me |
This is how I packaged the new clothes. Of course, I didn't get a picture until
after everything was taken out, but it was really cool nonetheless. I added tissue paper to each bag and box to make it even more special. It was like pulling new clothes out of the store bags after you get home.
 |
| Outfit handmade entirely by me, locker from Five Below |
You've seen Paige's outfit before, but I added the grey bolero since I showed it here. I decided to give her the black sparkly shoes with it, too, since Paige's other black dress shoes had come up with one missing just two days before.
Since I didn't share the black sparkly shoes yet (an oversight), I should probably tell you that I made them from a black sparkly vinyl sheet that I picked up at Hobby Lobby for around $1.29. I have plenty more for at least another pair, maybe two.
 |
| locker tin: Five Below |
See the locker? That wasn't even on my daughter's wish list, but when I
saw the locker tins at Five Below, I had to get them. I knew my kids
would love them, and I was right. American Girl's locker goes to
shoulder height on the doll. Ours isn't quite that high, but it's close.
I added a little height with painted candle cups glued to the bottom
for feet.
Ours also locks, which is just for looks on the American Girl version. My kids really liked that feature!
 |
| locker tin: Five Below, milk eraser: Target Dollar Spot, backpack: handmade by me |
I added a hook inside each locker so they could hang up their coats or sweaters, as well as their backpacks. I got the hooks from Dollar Tree. They're the kind that you hang with foam tape.
This is the only picture I thought to take of Paige's backpack that I designed and sewed myself. I love how it turned out!
 |
| Backpack: doggie bag dispenser found at Tuesday Morning; laptop: Dollar Tree compact mirror; paper supplies: handmade by me |
Here's what was in each of the backpacks: four folders (one had worksheets in it), one spiral-bound notebook (spiral from a regular spiral-bound notebook and holes made with my Crop-a-Dile), one binder (see below for details), a doll laptop (see below for details), and one composition book.
These were Alex's supplies. Paige's were all pink, with the exception of yellow folders.
 |
| Binder: handmade by me |
You can find various tutorials for making doll-sized binders, but all of them have you attaching paper permanently, so you can't take paper out or put new paper in. I wanted it to be functional, so I used a plastic binding coil and cut off every other coil. I used my binding machine to punch every other hole on the paper, and it's a perfect fit. Now we can take pages out and put them back in.
Here's a little tip: Don't waste your printer ink by printing lined notebook paper for the dolls. Just cut down college-ruled paper. It's the perfect size!
 |
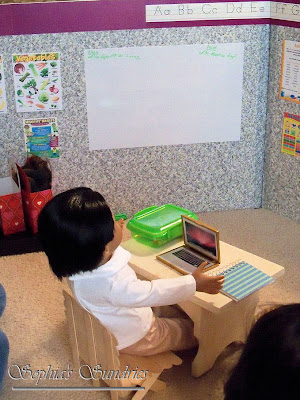
| Doll laptop: made from a Dollar Tree compact and free online printable images of a computer keyboard and screen |
Here's another look at those doll laptops. I just bought mirrored compacts from Dollar Tree, printed out some images of a keyboard and computer screen, laminated them, and glued them down to cover the mirrors.
You can buy mini laptop Macbook mirrors on Amazon for somewhere around $5, if you'd rather. I'm too cheap. :)
 |
| Desk: mini stepstool; chair: handmade from jumbo popsicle sticks |
 |
| Desk: mini stepstool; chair: handmade from jumbo popsicle sticks |
The desks were mini stepstools I found at the thrift store. I have to fine-tune them, though, because the dolls don't fit under them like I thought they did when I experimented with them originally. It might work to saw off that round support on the bottom, but I want to think a bit more before I do something that drastic.
I made the chairs out of jumbo popsicle sticks. Alex needed a back to his, so that was the inspiration for the chairs. They aren't the sturdiest chairs you've ever seen, but they will work just fine until I find or make a more durable solution. (I picked up a miter saw at a yard sale this summer, and I may try to make some chairs with it.)
 |
| Pencil box: Dollar Tree; mini tape dispensers: Michaels; mini fake pencils: made from bamboo skewers, aluminum foil and a perler bead "eraser"; mini crayons from a long-ago mini coloring book set; padlock: goes to the lockers |
Here is a closeup of the contents of the pencil boxes. Alex got a blue tape dispenser with no Hello Kitty stickers on it (I took them off), but otherwise they are the same.
 |
| Lunchbox: Dollar Tree container; food: erasers from Target |
Last but not least is the lunch. The "lunchbox" is just a small plastic lidded container that came 10/pack from Dollar Tree. The milk erasers were from Target Dollar Spot, and so were the cupcakes and strawberries. The sandwich erasers came from Target's party favor section. (I noticed they were clearancing them the last time I was in.)
So, how did I do? Let's see ... For the lockers, desks, backpacks, lunches, and school backdrop from American Girl, I would have paid
$324, plus tax. [Well, I would
never have paid that much. However, you know what I'm getting at here.] That doesn't include the outfits, which would have been somewhere around $30 each, making the total
$384.
To the best of my knowledge, I paid about
$40, and that includes
everything, including items that came several to a pack that I didn't use for this project (like the food and plastic containers). What's more, I was able to spread the purchases out over several months so it was almost like not paying anything because I never missed a dollar here and there.
For about 90% savings, I'm as happy as I can possibly be. You know what? My kids are, too, and that makes me even happier.
As they were going through everything, admiring it, my daughter turned to me and said, "Mommy, you'll have to show me how to make all these things when I grow up so that I can make them for
my daughter." Oh, I hope so!!
There were a few exchanges of, "We have the best mommy!" in there, too. That did my mother heart a lot of good.
What can I say? It was a win-win situation. I enjoyed making all of this, I
especially enjoyed watching their enjoyment of it, and they enjoy playing with it. Parenting just doesn't get any better than this.


- "Join Me on Facebook!
Contact