Friday, April 30, 2010 3 comments

More Monogram Notecards

Dollar Tree has some of the most gorgeous notecards right now, and I loved them so much I picked up a pack of each of them. This particular notecard is perfect for a monogram because they practically said, "We left this spot blank for a monogram!" Not really, but I saw the possibilities at first glance. :)


Supplies: stamps (Coffee House Alphabet by Inkadinkado); paper (Dollar Tree notecards, Georgia Pacific); ink (Versamark with white embossing powder); Nestabilities Scallop Circles Large; circle punch; dew drops.

I absolutely loved how this turned out! I used the sharp end of a compass to add an eyelet look to the edges of the scallop circle.

This notecard set also had a design on the back, but it wasn't exactly the same as what was on the front. I cut it apart anyway and made another set of monogram notecards with those panels:


Supplies: stamps (MS monogram set); paper (Dollar Tree notecards, The Paper Company); ink (SU! Rose Romance); MS 3-Dot corner punch; MS doily lace border punch; Nestabilities Labels 1; pink grosgrain ribbon; dew drops.

These didn't "wow" me as much, but I did think it was neat how the MS stamps fit so well into the Nestabilities shape. It reminds me a little of JustRite stamps.

I made these for my Heart Sister - the same one I made yesterday's stationery set for. I'm not giving them to her all at once or she'd get overwhelmed. I'm going to space them out over several months, giving her one set each month.
Thursday, April 29, 2010 1 comments

Stationery Gift Set

I was in the mood to make some monogram notecards, so I decided to pull out these gorgeous notecards I just picked up from Dollar Tree.


Was I ever surprised to find out both sides of the notecard are printed in this lovely print! There was no way I was going to let that back panel go to waste, so I cut the cards in half to get the most out of that gorgeous print.

Here's the notecard I designed with it:


Supplies: paper (Making Memories, The Paper Company, Dollar Tree notecards); stamp (Coffee House Alphabet by Inkadinkado); ink (Versamark with gold embossing glitter); MS PATP Iron Gate Fence border punch; Nestabilities Labels 1; CB Textiles embossing folder.

I wanted to line the envelopes of the matching stationery (picture is later in the post), so I decided to use the back panel of the cards for that. But since there were only 8 notecards to 10 envelopes, I had to get a little creative with how I used the remaining 6 notecards in order to get 8 full cards out of them. [Is that sounding confusing to anyone else?] That's when I got the idea of cutting the panel in half and accenting with other decorations. I based it on last week's 2S4Y sketch. I really liked how it came out!

Now, on to the envelopes ... I made a template for the liner, using the envelopes as a guide. (It's usually best to make a different template when you switch brands of envelopes, since they're all shaped just a little different.) But then I noticed that my notecard wasn't quite deep enough to line the envelope flap and the inside of the envelope that you can see. But I had some triangular scraps leftover from my cutting, so I decided to piece them. Here's what it looked like before I pieced them:


And here's what it looked like after I pieced them:


And finally, here are the envelopes with the liners in place:


It made a HUGE difference in the look of the stationery set! The pattern doesn't match up perfectly at the "seam", but the print is busy enough that you don't even notice it.

So here is the stationery, exactly how I bought it:


And here is the matching file folder that I bought. I opened it up for the picture. It came in a pack of 3:


Isn't it gorgeous? Again, the pattern was on both the front and back, so my decorating possibilities were doubled.

I made a stationery folder out of the file folder. I made it exactly like the first notepad holder in this post, except I didn't add a notepad. Here's what it looks like inside. (Sorry that it's sideways, but Blogger does that to the occasional photo, and I can't do anything about it.)


And here's what it looks like outside, complete with the matching notecards:


I made them for my Secret Sister who loves to write, and I think she's going to like them. I know I love that print! :)
Wednesday, April 28, 2010 3 comments

I Challenge You Wednesday: Scoring Board Backgrounds

If I want to be inspired by everything BUT a certain thing, all I have to do is choose it for a challenge. :) I've had scads of ideas running through my head, and I've been working feverishly every night to get those ideas onto cards and other projects ... but none of those projects involved using my scoring board for a card background. So I had to make myself sit down and do something for the challenge - last night!

Here's what I came up with:


You can see the scoring better on this first picture, but the second picture is actually a better photo of the card:


Supplies: stamps (Bird's Cards rose, Martha Stewart leaves, Studio G sentiment); paper (Making Memories, Dollar Tree notecard, The Paper Company); ink (Versamark with iridescent embossing powder and gold embossing powder, SU! Old Olive); MS scoring board; satin ribbon; Sizzlets tag die; MS PATP Iron Gate Fence border punch; dew drops.

I used the scoring board to make a diagonal scored background on both the background paper and the vellum. I thought it mimicked lattice a little bit. It was really easy to get perfectly-spaced diagonals. I have a Martha Stewart scoring board, so I just pulled out the envelope template that comes with it and lined up my paper against the slanted edge, scoring at every 1/2". Then I turned it and scored the other way, and it was done. Super easy!

I also popped the vellum section on dimensionals so it wouldn't blend in too much with the floral background.

I wanted to make a nice bow to go on the card, so I went back through all the tutorials I had bookmarked about how to make them painlessly. I remembered a tutorial using a fork, but that produces a tiny bow, even with my large serving fork as a base. So that got me to thinking - couldn't I just make a big fork shape out of cardboard and do it that way? And that's exactly what I did:


And then I discovered that I could also follow the instructions for the Bow Easy using this handy dandy little cardboard template. Those are the instructions I followed to make the bow on the card. The most helpful (and easiest) video tutorial is Gina K's. If you do a search on youtube, I'm sure you'll come up with it.

Basically, you decide about how big you want your bow to be (mine is roughly 4" wide). Then you cut your cardboard to that width. Then all you really need to do is cut a smallish slit in the middle of the cardboard (the outer two slits aren't necessary if you're wanting to make a bow that looks like the Bow Easy bow). Follow the directions on the video, and you're done!

My friend made a slew of cards for this challenge, so you really need to visit her blog and see what she did! :) Go back through the last few posts while you're there because she already shared a few sneak peeks over the last week or so.

Since I happened to use my favorite flower (the rose) and dry embossing (with my scoring board) on this card, I'm entering it into this week's Cuttlebug Spot challenge. And since I designed it with Mother's Day in mind, I'm also entering it into the Stampin Sisters in Christ challenge for this week. I don't always play along with the challenges, but when a project fits, I might as well, right? :)
Tuesday, April 27, 2010 4 comments

My kids' Dollar Tree travel mugs

I hope this video works for everyone. I used my digital camera. I'm sure it's nothing like what other bloggers are using, but it's all I have and I think it worked. :)
Don't count on me doing videos very often, but this was one of those projects that you just have to be able to rotate to see it ... so I did a quick video.

I think I'm going to keep these mugs a surprise (from my kids) until our next road trip, so you're getting to see them before my kids do!
John Deere Mug Supplies List:
paper (The Paper Company, ATD); sticker (Creative Imaginations); letters (Colorbok Alpha Stax); travel mug ($1 Tree).

Hello Kitty Mug Supplies List:paper (The Paper Company, ATD); letters (Colorbok Alpha Stax); Hello Kitty cut-out; MS heart lace punch; travel mug ($1 Tree).
I hope you enjoyed these. They were fun and quick to make.
Monday, April 26, 2010 5 comments

More Scrap Quilt Cards

I had some leftover frames from cutting the rose cards I featured on Tuesday, so I saved them and made some more quilt cards with tiny scraps from my scrap paper bins.

First is a purple version:


I used scraps of the embroidery-look paper I featured on my coaster card in last week's Wednesday challenge.

Then I made a pink one:


The decorative paper is a scrap of Creative Memories paper (1x12") I've had in my scrap file for several years. I was glad that this beautiful paper didn't have to be thrown out.

And lastly is a blue version:


The floral paper is leftover from a year or so ago when I made notecards for my nieces. The paper isn't my style at all, but I found that I actually liked it when I cut it up and toned it down with another paper.

These cards are so much fun!
Friday, April 23, 2010 0 comments

Decorative Travel Mug

I picked up a "design your own" travel mug at Dollar Tree the other day. I had made some of these before, but it was before I branched out of scrapbooking much. So I saw this one and knew I wanted to make a cute one for my Secret Sister.


Now before I go any further, please understand that this is not an insulated travel mug. If you go looking for them at your Dollar Tree, I don't want you to be disappointed. They are simply a cute, decorative way to take a drink along with you while you're out and about. They work best with cold drinks since you can simply add ice to keep it colder longer.

Anyway, here's my super-simple, less-than-5-minutes makeover:


I simply pulled out a piece of decorative scrapbook paper, used the insert as a cutting guide, and inserted it into the mug. (It screws off.) This was the easiest project I've done in a long time.

And in case you're wondering why I chose this paper, I have two reasons. First of all, my Secret Sister likes blue. And secondly, the little tab at the top has a bit of blue on it that matches quite well:


I hope she likes it as much as I do! :) I think I might even make some of these for my kids since they like to have their own personalized things and they're always eyeing our travel mugs when we go on a road trip.
Thursday, April 22, 2010 8 comments

Old-Fashioned Girls (Digital Two for Tuesday)

Did you ever make a card (or in this case, several cards) that you just couldn't wait to share? Well, I made these last night and couldn't wait to show them to you this morning.

I follow the Digital Two for Tuesday blog, and I love collecting the images she gives out each week. However, I'm not very good about actually making anything with them - except for that one time when I guest designed for her. :)

But when I saw these girls, I knew I had to make something with them. I hope this encourages her to keep offering the images! People really do end up using them, even if it takes awhile.


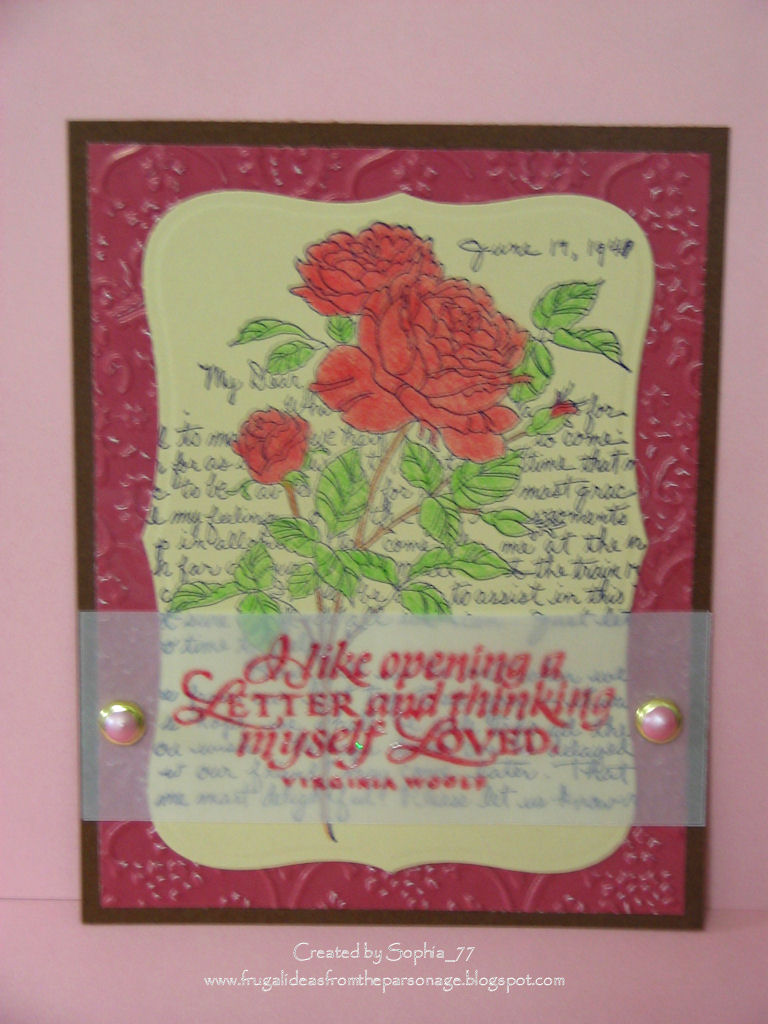
Supplies: stamps (Digital Two for Tuesday, Stamp Happens); paper (K & Co, unknown, Making Memories, The Paper Company); ink (Versamark with chalks, BIC markers); MS PATP Eyelet Lace; Nestabilities Labels 8; dimensionals.

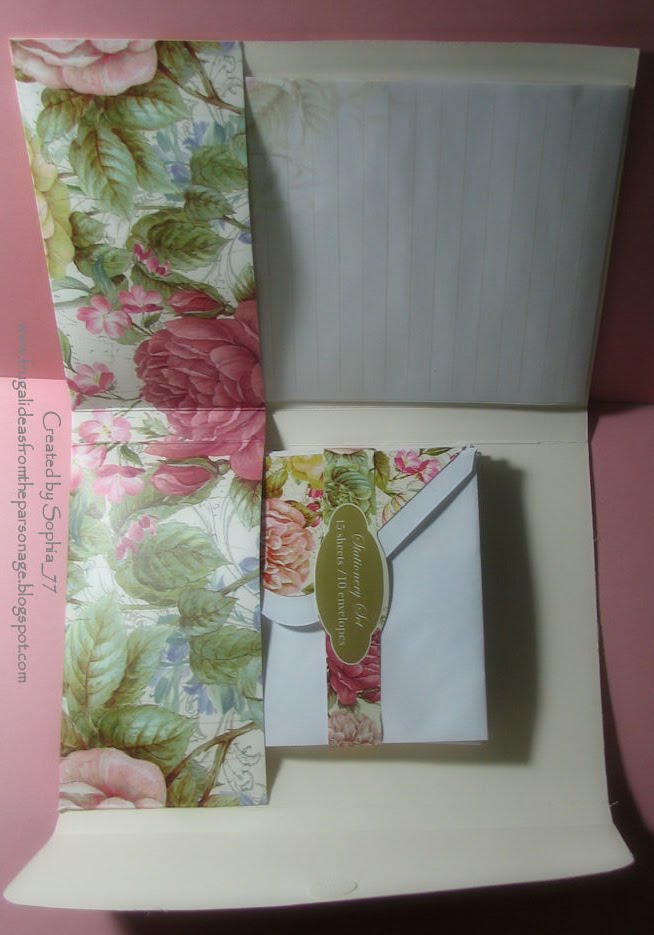
I already had the base of this first one made, but it just wasn't coming together like I wanted it to. Originally, I had intended it to be a quilt card. But since this scrap was bigger (4x6"), I tried to fit it onto a 5x7" card and it just wasn't thrilling me. So I set it aside ... and then realized it was perfect for this image.

So I used the paper as a coloring guide for my image. I discovered that it's best to go with light colors for these images since they're vintagey. In case you'd like to know which specific BIC colors I used, here you go: Peach Parfait (skin), Tiki Hut Tan (hair and shoes), Summer Melon (dark clothing accents), and Yellow Blaze (main clothing color).

Before I forget, let me mention that I almost always print my digital images using only my black ink cartridge (it's cheaper). As a result, I had to pull these images into my photo editing program and choose "Fade Correction" to make them dark enough. I also chose to "Remove Digital Noise", and it smoothed out the stray dots on the faces and such. If you use a color cartridge in combination with your black cartridge, they may print for you just fine as they are.


Here's a close-up of the main image to show you a really cool technique I learned from Lindsay Weirich. (Sorry, I've searched and searched and still can't find her exact posting, but I'll try to explain it.)

After I had colored the girl, the white background looked pretty stark next to my warm yellows. So I used a trick I learned from Lindsay. I'm not sure if this will work with dye-based markers, but feel free to chime in if you do know!

Anyway, I colored my image with my (permanent) BIC markers. Then I inked up this stamp with Versamark and stamped it right over top. I chose yellow chalk and rubbed only where I wanted the background image to show (i.e. not on top of the girl). I went back over it lightly with some orange chalk to make it a "warmer" color. The really neat thing is that the Versamark doesn't show on my main image. Isn't that cool? I doubt it would work on colored paper (since it would probably also watermark on my image), but it works great on white! Besides, we mostly color images on white, right?

Okay, so let's go on to the second adorable little girl ...


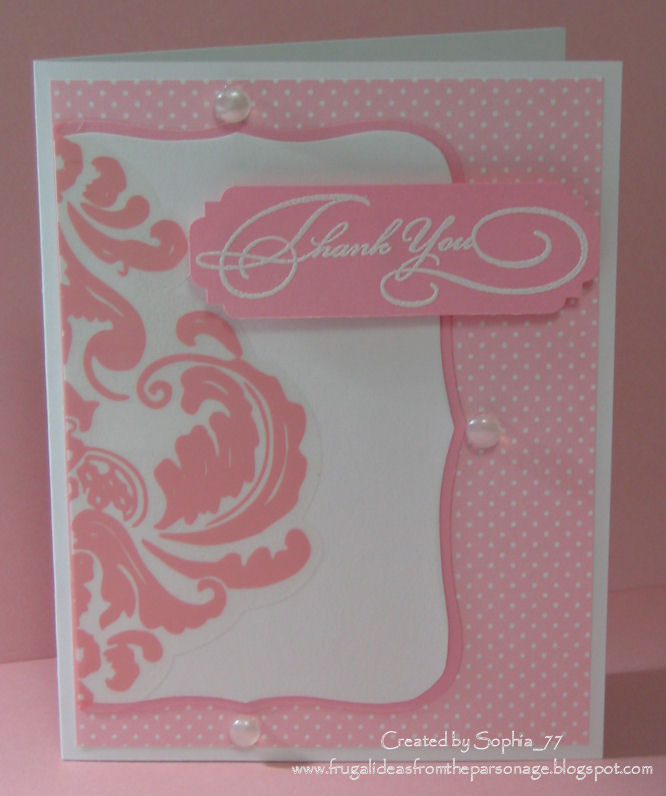
Supplies: stamps (Digital Two for Tuesday, Inkadinkado sentiment); paper (Making Memories?, The Paper Company); ink (SU! Bliss Blue, BIC markers); Nestabilities Scallop Circles Large; MS PATP Iron Gate Fence border punch; paper doily; white pearl dimensional paint.

I used the patterned paper as a guide to coloring this girl, too. I used: Peach Parfait (skin), Tiki Hut Tan (hair and shoes), Oceanview Blue (clothing), and Lemon Bliss (clothing).

After she was colored, I cut her out and mounted her onto the doily-and-scallop-circle base, slightly off-center so I could stamp the sentiment right beside her.

I really like how this one turned out!

And then I have one more ...


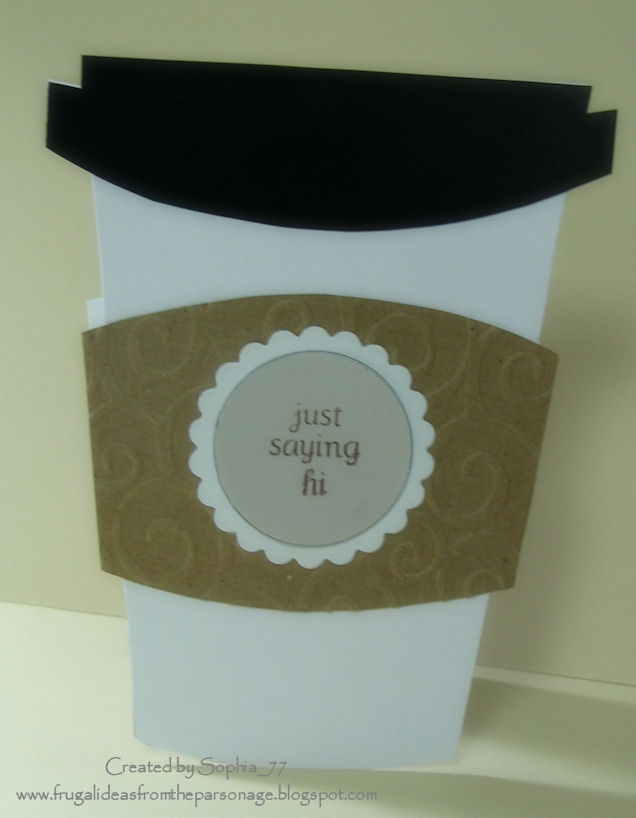
Supplies: stamps (Digital Two for Tuesday, Inkadinkado sentiment, Studio G leaves); paper (Making Memories, The Paper Company); ink (SU! Bliss Blue, BIC markers); Nestabilties Labels 8; MS doily lace punch; paper doily; pearl dimensional paint.

As I was laying this one out, I remembered a sketch challenge I had seen just this week (and really liked), so I'm entering this one in the 2 Sketches 4 You Laura's Sketch 50 Challenge. I'm sure there's an abbreviation I'm supposed to use, but I couldn't find it anywhere. Sorry! :)

I used the same Versamark and chalk technique on the background of this image. The leaf stamp worked pretty good with my decorative paper, so I was pleased!

I hope you enjoy these cards as much as I do, and I hope you go check out the Digital Two for Tuesday blog. She is so generous and has some really nice stuff on there!
Wednesday, April 21, 2010 0 comments

Glittery Leaf Birthday

I got this clear leaf Martha Stewart stamp set at Ollie's last week for $1.29, and I wanted to make something with it. This isn't what you probably think of when you think of leaves, but the card just kind of evolved to this glittery creation. :)

Here is the clearest picture:


And here is the picture where you can see how it sparkles (although the picture is a bit blurry):


Supplies: stamps (MS Leaf and Branch stamps, Inkadinkado sentiment); paper (The Paper Company); ink (Versamark combined with white embossing powder and green embossing glitter); Nestabilities Labels 1 and 8; CB Swiss Dots embossing folder; MS leaf punch; silk flower; white pearl dimensional paint (for flower center).

I started out with the brown panel embossed with white leaves. Then I thought it would be a little more interesting if I cut it into a shape, so I used my Nestabilities Labels 8. Then I decided to emboss it with my Swiss Dots folder. Once I put it on a black cardfront, I thought it looked a little plain, so I got the idea to use the green embossing glitter around the edges. Then I needed green somewhere else on the card to pull it together, so I accented my sentiment with punched and glittered leaves and a silk flower.

You see, it sort of took on a life of its own. :) But I like it!
Tuesday, April 20, 2010 5 comments

Rose Letter Cards

My friend gave me this stamp for Christmas, and I've been wanting to do something with it ever since. I was a little intimidated by it, though, because it's an all-in-one stamp -- the background is actually part of the same stamp.

But I decided that it was high time I did something with it, so I got it out and stamped it several times on cream cardstock to see what I could make with it. I ended up with three cards that I absolutely love (I only colored three images), so I thought I'd share them with you today.

I combined them with this retired PSX sentiment since the background is a handwritten letter. I thought the sentiment was especially appropriate!


Supplies: stamp (main image by Stamp Happens, sentiment by PSX); ink (SU! Rose Red, SU! Basic Black, Versamark, BIC Mark-Its); paper (The Paper Company, vellum unknown); Nestabilities Labels 8; CB Textiles embossing folder; homemade pearl brads.

I colored the first one with my BIC markers. I like the bold look it gives, and how well it stands out from the background.


Supplies: stamps (Stamp Happens, PSX); ink (SU! Basic Black, SU! Rose Red, Versamark, Marvy markers); paper (The Paper Company, Making Memories, vellum unknown); Nestabilities Labels 8; CB Textiles embossing folder; regular office brads.

I colored the next one with my dye-based Marvy Markers. I was surprised at how well it came out! It's not as intense as the one I colored with BIC markers, but it's a nice effect.


Supplies: stamps (Stamps Happen, PSX); ink (SU! Basic Black, SU! Rose Red, Versamark); paper (The Paper Company, recycled book page, vellum unknown); Nestabilities Labels 8; CB Textiles embossing folder; homemade pearl brads; image colored with colored pencils and blended with baby oil.

This was yet another completely different look, but still very pretty. I was so pleased with these cards!
Monday, April 19, 2010 6 comments

Sympathy cards for my stash

If you remember, I've had a need for a lot of sympathy cards lately. I used all of the ones I had on hand, so my goal was to replenish my supply so I wouldn't have to crank them out at the last minute.

I searched on Splitcoaststampers for some sympathy card ideas, and I really loved this one. I chose to use it as an inspiration piece for my cards.


Supplies: stamp (Inkadinkado); paper (Georgia Pacific); leaf punch (Target $1 Spot); Prima flowers; dew drops; white pearl dimensional paint; CB Textiles embossing folder; Versamark and gold embossing powder.

I was going to add gold satin ribbon, but I liked how it looked without it. Why mess with a good thing, right?

I was so pleased with how these turned out!
Friday, April 16, 2010 2 comments

Damask Sticker Cards #2

You know me. Even if I paid just $0.04 for each damask sticker, I still want to see how far I can stretch them. :) So I decided to cut one in half and see what I could do with it to make it stretch over two cards.


Supplies: stamInkadinkado); sticker (Heidi Swapp damask); paper (Making Memories, The Paper Company); Nestabilities Labels 8; homemade glue gun pearls; Versamark and white embossing powder.

I was quite pleased with this one. It's very feminine, which is definitely my style. (The sentiment is popped up on dimensionals.)


Supplies: stamps (Inkadinkado, Michaels $1 section); paper (The Paper Company); sticker (Heidi Swapp damask); Nestabilities Labels 8; homemade glue gun pearls; Versamark and white embossing powder.

But this one was my favorite, no question about it! I made the background with the $1 stamp from Michaels, and I just love that background! Everything else was pretty much the same, except that I placed the sentiment on the bottom of the card instead of the top this time.

Here's a little tip about stamping a background with small stamps: I measured my stamp (1-1/2" square) and then scored my background paper at 1-1/2" increments both ways, creating 1-1/2" squares. It was really easy to line up the stamp each time, there were no messy lines to erase, and it even added to the background decoration.

I'm having so much fun with these damask stickers!
Thursday, April 15, 2010 1 comments

Damask Sticker Cards #1

I loved those Heidi Swapp damask stickers I got at Tuesday Morning last week, so I just had to sit down and see what I could make with them.

This first card was my first attempt at using them, and I'm not thrilled with it ... but it's a card and it's not crooked or anything, so it counts. :)


Supplies: paper (The Paper Company); sticker (Heidi Swapp damask); Labels 8 Nestabilities; MS PATP Iron Gate border punch; CB Textiles embossing folder; dew drops.

I didn't know where to start, so I got my color combination from a color challenge over at Splitcoaststampers. Sorry, but it didn't do anything for me once it all came together ...

But that's okay because the cards that follow more than made up for it, and if it just got my creative juices going, it was worth the time.


Supplies: paper (The Paper Company); sticker (Heidi Swapp damask); MS PATP Iron Gate border and corner punches; black satin ribbon.

I started with this one. I got the idea to mat the sticker onto pink, cut it into three sections, and separate them just enough that the white frame behind it would show through. I really, really liked the effect! All I added after that was a bow, and it was finished.

I liked that so well that I decided to try it with each of the sticker colors. So that brings us to the white damask stickers ...


Supplies: paper (The Paper Company); sticker (Heidi Swapp damask); MS PATP Iron Gate border and corner punches; pink satin ribbon.

The only things I changed were (1) black paper for the backing and (2) pink ribbon for the bow.

Wow! I got another card that I love, so I tried the pink damask sticker ...


Supplies: paper (Making Memories, The Paper Company); sticker (Heidi Swapp damask); MS PATP Iron Gate border and corner punch; pink satin ribbon.

The only things I changed here were (1) the color of the sticker and (2) the color of the frame.

I just love these three cards! They could go just about any direction I need (except maybe a masculine birthday).
Wednesday, April 14, 2010 1 comments

I Challenge You Wednesday: Sewing

My friend picked this challenge, and once again it was a challenge for me. You would think it would be easy since I sew quite a bit, but for some reason combining sewing with cardmaking just wasn't coming to me. (It might have gone better if my sewing machine was working and I could have used that, but oh well!)

Between funerals and sickness (which I'm still dealing with), I haven't had a lot of time in the craft room the last few weeks. My inspiration was MIA for this first card ...


Supplies: stamp (Inkadinkado); paper (All My Memories, Making Memories); felt coaster (Michaels $1 section); Nestabilities Labels 1; dew drops; Versamark and clear embossing powder.

You probably can't even see the sewing I did. :) I sewed the felt coaster to the Labels 1 Nestabilities shape. If you look really close and look for the contrasting green thread, you'll see it. To make up for that, I chose this background paper that has been sitting in my stash for several years (by All My Memories). It looks like embroidery, so I thought it fit in quite well with this challenge.

This isn't my favorite card ever, but it got me started on other cards that I actually did like.


Supplies: stamp (Inkadinkado); paper (Serendipity by ATD, Making Memories, The Paper Company); ink (SU! Chocolate Chip); buttons (SEI); Nestabilities Labels 8; embossing folder (CB D'vine Swirls).

I racked my brain to think of what I had that would work for stitching, and then I remembered that I had wanted to make some quilt cards. These cards are great because you can use up your scraps without your card looking like it. In fact, I pulled all the tiny scraps out of my pink/red bin to match up patterned papers for these next few cards. The "stitching" is just done with a permanent marker and ruler.


Supplies: stamp (Inkadinkado); paper (Making Memories, The Paper Company); ink (SU! Chocolate Chip); Nestabilities Labels 8; embossing folder (CB D'vine Swirls); buttons (SEI).

This is the same overall design as the previous one, just with different papers.

A little tip about cutting the "quilt" with the Nestabilities: I used a frame that was leftover from the last time I cut a Nestabilities shape. Underneath that, I cut an index card to the right size (4 x 5-1/4") and glued the individual squares onto that. Then I glued the frame on top of it and embossed. It only looks like I cut the quilted part with the Nestabilities, and it helps immensely with keeping those little squares in place. [I hope that makes sense.]


Supplies: stamp (Inkadinkado); paper (Making Memories, The Paper Company); MS doily lace border punch; buttons (SEI); embossing folder (CB D'vine Swirls); Versamark and black embossing powder.

I really like this last one, too! It was inspired by this card from Splitcoaststampers. I would never have put these colors together on my own, but I like them. It's reversible paper, so I just flipped every other square to get an easy color combination.

By the way, I actually debossed the pattern on this card, and I think it looks a bit more like quilting this way. I wish I had thought of it on the previous cards!

That's all for me today. Just wait until you see what my friend made! I got a peek at a few of her challenge cards last week when I was at her house, and they were gorgeous!
Tuesday, April 13, 2010 1 comments

Coffee-to-Go Shaped Card

I saw this card at Splitcoaststampers a few months back, and I fell in love with its cute shape! I don't drink coffee very often, but my Secret Sister does. She also writes a lot, so I made her a set of 6 shaped notecards:
I just freehanded the cup by cutting a piece of scrap paper to 4-1/4 x 5-1/2" and going from there (these are all straight lines, so it's pretty easy). I don't have a paper crimper, so I used my D'vine Swirls embossing folder on the wrap. The sentiment is from a clear Inkadinkado set that includes fancy circles and a whole bunch of sentiments.

Enjoy!
Friday, April 9, 2010 2 comments

Another calendar sympathy card

I made another sympathy card from the same calendar page as yesterday's card.


I silhouetted the roses again, mounted them onto the same green slightly-patterned paper, and then mounted all that onto a cream card base (5x5"). I accidentally stamped the sentiment crooked the first time (thankfully it was Versamark and not black ink). So I stamped the sentiment onto vellum instead and cut it out (with Nestabilities Labels 1) to layer over the mistake. It worked beautifully!

Speaking of working beautifully, let me share a little tip that escaped me until this week. I've been searching for a great white ink. I wanted something opaque and strong, unlike anything I've ever found in the stores. So while I was browsing in Michaels on Monday, I happened to notice a white embossing powder. Why didn't I think of this sooner?? I got the "Detail White" since I usually want the detail, and it works beautifully. I just use Versamark ink, add the white embossing powder, and I get perfect results every time.

I know, I know. Probably everyone else in the craft world knew that already. But just in case you're like me and hadn't figured it out before, now you know! :)
Thursday, April 8, 2010 0 comments

Sympathy calendar card

There has been yet another death in our church family, so I needed to make some quick sympathy cards. (I haven't had a chance to replenish my stash since the last funeral.)

I immediately thought of these beautiful rose images from the $0.30 calendars I got at Michaels in the beginning of the year.


I silhouetted the roses and mounted them onto a green slightly-patterned paper from Making Memories. Then I used my MS PATP Iron Gate Fence corner punch on three of the corners and added dew drops at each point.

I was quite pleased with how it turned out!

(For reference purposes, this is a 5x7" card.)
Wednesday, April 7, 2010 1 comments

This year's Hot Cross Buns packaging

Today would usually be the day that my friend and I post our challenges, but we're going to a bi-weekly schedule on those through the summer, since our schedules get pretty crazy from here on out.

So today I thought I'd share the packaging for this year's Hot Cross Buns. Last year was my first year to give these out to my Sunday school class, and they were very well-received! I've found that most people have never eaten Hot Cross Buns, and most of them decide they're delicious! :) (If you're wondering, I would describe them like raisin bread with icing. YUM!)

Anyway, this year I had a lot of other things to do, so I didn't recreate the boxes from scratch. Instead, I used these small takeout boxes I had gotten really cheap at a thrift store sometime within the past year. I lined them with parchment paper, added a Hot Cross Bun, and then decorated the outside of the box.


I used a mixture of clear and rubber Studio G stamps from last year. The sentiments are from the clear set, and the cross was a rubber stamp. Of course, I used my scallop circle Nesties for the purple part. The yellow ink is SU Yo Yo Yellow. Oh, and the scallop part is popped off the box with dimensionals.

The top of the box looked awfully bland, but I didn't have a lot of time, so here's what I did:


I added a yellow Prima-like flower, topped it with an "iced" purple Prima, and then finished it off with a clear dew drop in the center. It was just what it needed!
Tuesday, April 6, 2010 2 comments

Some of my favorite Easter pictures

Of course I took pictures on Sunday, and I thought I'd share my favorites today.

The first few are my daughter, who got all the photogenic genes for her generation and mine!


These first two were taken on the porch of our church, but it was so bright that she was having a hard time keeping her eyes open. Not only that, but huge bumblebees were dive-bombing that beautiful tree behind her, and it was even getting to me! :) So we took it inside ...


I love these last two of her! I asked her to look out the window. I didn't tell her to look serious, but I got exactly the look I was after. I just love the natural light in these pictures!


This is me with my daughter. We didn't match perfectly, but it's close enough to know she was mine! :)


And then my son, who wasn't totally sure about posing beside these artifical "flowers" inside the church.


And one of the best smiles ever from my husband and son. I had just gotten them to laugh, and I love these smiles! (My husband thinks his smile is a little too big, but I think it's perfect

So there is your little peek into our very traditional Easter Sunday. I hope you enjoyed it!
 
;