Supplies: stamps (Cloud Nine Design; K & Co); paper (The Paper Company, Making Memories); ink (SU Rose Romance, SU Rose Red); Nestabilities Scallop Circles Large; Martha Stewart 3-Dot corner punch; Creative Memories Victorian Borderlines ruler; embossing folders (CB Swiss Dot, CB Victoria).
See that white fancy shape? I made it with one of Martha Stewart's corner punches and a Creative Memories decorative ruler.
Becca Feeken (from Amazing Paper Grace) was the first person that I know of to figure out a different use for corner punches - other than the obvious punching of corners. Since then, several other people have begun to experiment and have come up with some gorgeous results. This card inspired me to try this particular technique.
Let's see how it's done. (Please note that I'm not the first person to think this up. I'm just showing you how I did it, since I always wish other bloggers would do the same when they come up with something different and pretty.)
First of all, I experimented with 3x5" notecards, since they're cheap and I don't mind wasting a few. Pull in the wings on your Martha Stewart corner punch and insert the paper into it as shown:

Try to visually center it. Punch out that shape, then reposition your punch as shown:

The left side of this is flush with the left side of the paper, so all you have to worry about is getting it perpendicular to the last punch you made. (You won't necessarily see part of the original punch-out when you're completing this step. That's okay because we'll trim later.)
Do the same thing to the righthand side, and your paper will now look like this:

Trim off those strange polygons, aiming to create a seamless effect like this:

Do the same procedure on the opposite end of the paper. Then use a decorative ruler to mark a decorative line between the two edges (on the previously-uncut long edge).

Here is what mine looked like when it was done:

With a slight variation of the ruler, I got this:

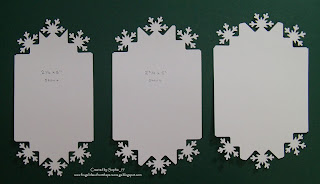
Since that experiment turned out so well, I pulled out all of my Martha Stewart corner punches and found out what results I would get with each of them. I also experimented with the width of the paper. From left to right, they start out at 2-1/2" wide, then 2-3/4" wide, then 3" wide.
This first is my Alpine Lace (or something like that) punch:

It didn't need any decorative side edges.
This is the 3-Dot punch:

It didn't need decorative edges, either. I experimented with the edges and liked them all.
Here is the Eyelet Lace punch:

This one really needs a decorative side edge, in my opinion.
And lastly, here are the results with the Iron Gate Fence punch:

I also used the border punch on these edges, but this is the only punch it worked out for. I liked them both ways - the original decorative edge (as seen in the tutorial) and the border punch edge.
So there you have it - exact instructions on how to duplicate these really pretty decorative shapes. Who needs Spellbinders' medallions when you can make these??
If you try this, I'd love to see your results!


5 comments:
Looks like you've been busy punching and coming up with new designs. I'm thinking it it works best with the MS punches though -- as I tried Becca's designs with some other corner punches and it didn't work.
Yes, I'm pretty sure only the MS punches will work for these. I'm not sure why, but they must be designed differently inside.
Hi Sophia!
I did a Google search for "circles punched with martha stewart corner punches" and I got your beautiful examples. I just wanted to say thank-you for posting this. I have several MS corner punches and I will be experimenting more with them!
I love your variation on Becca's right angle punching. (Love her tutorials!) I have a punch similar to your decorative ruler...also a template...going to try it with both. Thanks for the very creative and beautiful idea!
i been on the lookout for the iron gate punch, if u ever find a extra set lmk, i love it
Post a Comment