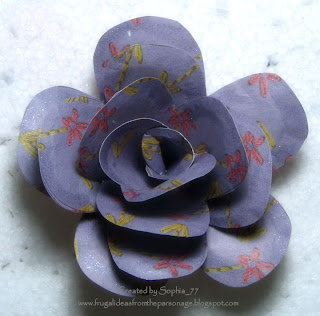
I was pleasantly surprised at how easy these were. The best (and easiest) tutorial that I found was Beate's over on Splitcoaststampers. One thing I changed: Since Glossy Accents (or its equivalent) takes soooo long to dry, I used Beacon 3-in-1 Advanced Craft Glue. It's quick-grab and sets up quickly. I found that my pieces were ready to use as soon as I was done gluing a group.
So, with all of that information, take a peek at the roses I've made so far ...

This one was made with thin patterned paper. I liked how it looked but I wanted to see what it would look like with iridescent microfine glitter on the tips of the petals. Unfortunately, I forgot to take a picture of it until right before I dipped it in the glitter, so you can probably see the glue on the petals. Imagine it's not there. :)

And here is that same rose with glittered edges. I really liked the effect. The picture doesn't do it justice! This rose is about 2-1/2" all around ("squared," if you will).

I made this rose with a larger petal, and it's about 3-1/2" all around (or "squared"). And just to give you an idea of how big that is, here is what it looks like in proportion to my hand:


Next is another rose done with a thicker patterned paper (hearts) ...

For this one, I gold-embossed pink cardstock with my French script stamp before cutting out the petals and inking the edges. I think this one is my favorite!

This was made with a lightweight patterned paper, although you can't readily see the pattern (thanks to my zealous sponging). :)

And lastly is another yellow rose made with lightweight patterned paper.
Just a quick tip on using regular paper instead of grungepaper: Grungepaper will bend and curl between your fingers, unlike regular papers (or so I'm told). To make up for that, I used a stylus on the back of each petal before I assembled the roses. Simply place the flower cut-out upside-down onto a mousepad (or something with similar "give") and rub a stylus over the edges of the petals in a circular motion. It will make the edges curl quite nicely, although you may have to help them along just a little after the rose is assembled.
Since these flowers are so dimensional, I wouldn't recommend them for cards -- unless you're hand-delivering them and don't require an envelope. However, they'd be great to decorate boxes and other 3-D projects. I'll be using them soon, so stay tuned! :)
If you make some, I'd love to see what you come up with!


2 comments:
Beautiful flowers --- I love 3-D things like this. Since I do a lot of hand-delivering of cards -- I wouldn't hesitate for one minute to use them on cards.
I saw Beate's tutorial...and yours are even more beautiful! I love the different looks you gave them. Now I can't wait to try them out, too! Thank you so much for all the good ideas you have given me!
Post a Comment