A little while ago, my grandmother called and asked if I could make her some half-aprons. Hers are wearing out, and it's no wonder. She has well-loved vintage aprons that she has probably had since they were new. Hey, my grandmother is vintage! :) She is 84 this year.
I've been busy with other projects in the meantime, but yesterday I looked at a pack of vintage pillowcases that had just a decorative edging on them, and I got inspired. About two hours later, I had two half-aprons ready to put in the mail.

This isn't anything earth-shattering, but I know I like to have all the steps laid out for me before I begin even the simplest of projects. So I decided to write up a detailed tutorial (complete with pictures) for how to make a half-apron from one pillowcase - and nothing else except a sewing machine and thread.
Here goes ...
I used a standard-sized pillowcase with decorative edging.

Cut off the side seam of the pillowcase. (See that stain? It's from the ribbon used to tie the pillowcases together in the packaging 20+ years ago. It will be gone in a minute.)

Cut off the top seam (I turned it sideways to cut it) ...

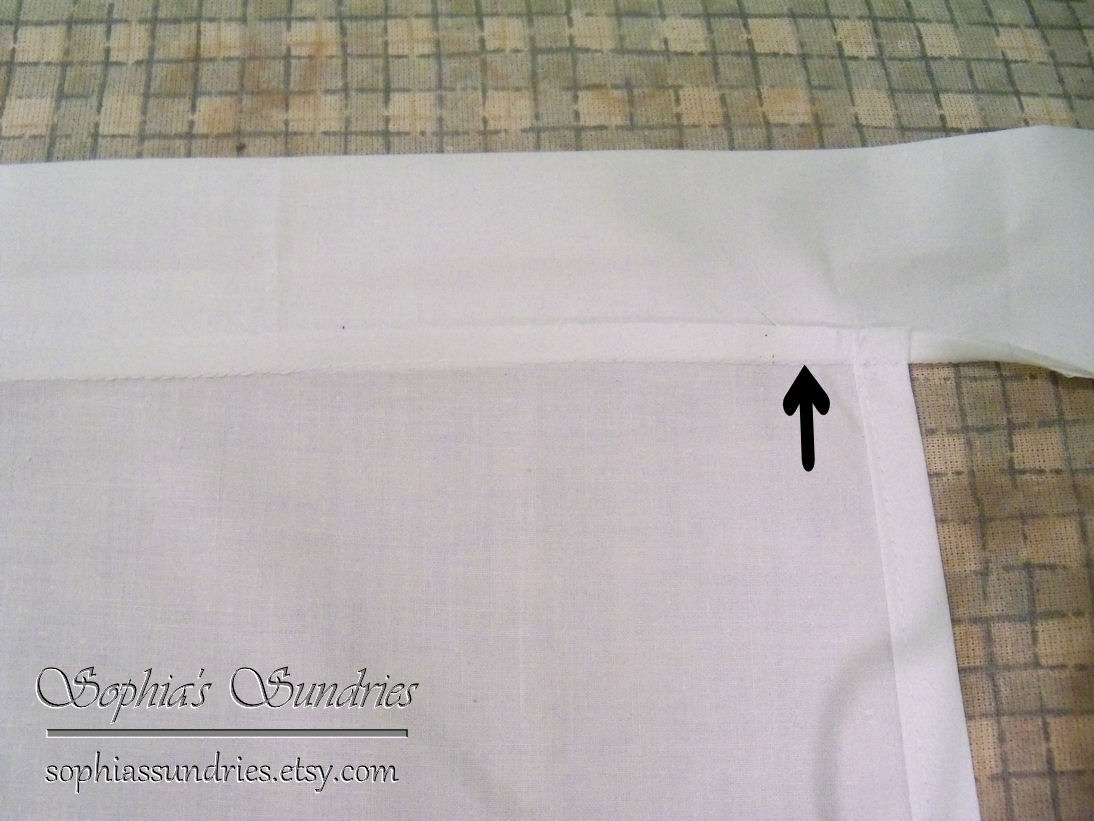
... then an additional 10” from the top.

From this 10”, cut two 4” segments. Discard the 2” segment. The 4” segments will be the waistband.

Returning to the main pillowcase piece (with the decorative edging), trim 5” off one side, to include the decorative edging. Repeat this one more time.

From the 5” strips, trim the main pillowcase 1” above the decorative edging. These will be the pockets.

Sew the two waistband pieces together on the short ends, creating one long 4” strip of fabric.

Press waistband seams open.

Press waistband in half lengthwise, creating a long 2” strip of fabric.

Fold in 1/2” at each end and press to hide raw edges.

Press sides of main pillowcase piece 1/4”, then another 1/4”. This encloses the raw edge.

(1) Press top 1” of each pocket piece so that it lies flush with the beginning of the decorative part.
(2) Fold this under again and press. This will be the top of the pocket.

Sew sides of main pillowcase piece about 1/4” from the edge to enclose the raw edge.

Sew the tops of the pockets to enclose the raw edges.

Sew edges of pockets at 1/4” to keep layers together and create the 1/4” fold line for pressing.

Pin main pillowcase piece to the waistband piece, matching centers and aligning raw edges.


Sew at 1/4” from the edges of the waistband, beginning at the very beginning of the waistband. (This helps to keep the pieces from slipping in the next part.)
Press the seam toward the waistband,

turning under the edges (along the stitching) that were not included in the seam.

Fold and press the waistband in half, enclosing all raw edges.

Stitch, beginning at the open edges of the waistband.


This is the time to add a sew-in tag, if you'd like.

Press the pocket sides in 1/4” (using basting lines as a guide) so that raw edges are on the back.

Pin pockets to the apron where you want them. I found the center of the apron and measured an equal distance to both sides.

Sew down the pockets, being sure to catch all raw edges in the seam.

You're done! Try it on and enjoy it.

Fine print: Feel free to use this tutorial to make items to sell, or simply for personal use. You don't have to credit me because I'm certainly not the first person to think of this. (Of course, you're more than welcome to link to me if you'd like, but don't feel obligated.)
The only thing I ask is that you do not post this tutorial on your own site and claim it as your own. I don't mind a bit if you want to use one of the pictures and link back to me. In fact, I always appreciate a link-back!
I'm linking to these parties.
I'm linking to these parties.


3 comments:
I'm sure your grandmother will enjoy her "work of heart" gift.
Excellent tutorial- love it!
so sweet! another project to add to my to do list!
Post a Comment