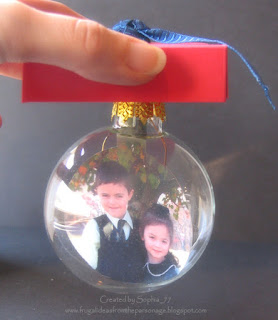
I found these clear glass ornaments at Dollar Tree last year (3/pack). I bought enough (7 packs) for the project, because I suspected they wouldn't carry them all the time. Well, I was right. I haven't seen any at Dollar Tree this year. But I already had what I needed, so it's no big deal.
I found the tutorial for this box to hold them on Splitcoaststampers here. Last year I had used PTI's template, but I like this box because it only uses one sheet of cardstock (plus a 4.25" square) per box. When you're making 20 boxes, it matters! :)
So here it is in the box:

And here is the ornament, dangling from the lid:

The photo inside looks distorted because of the angle I had to shoot from, but it looks normal in person.
If you want to make something similar, here's a tutorial from Splicoaststampers. I used a photo instead of the acetate and stamps. The only thing you need to know is that you will have to smooth the photo slightly once you've rolled it enough to fit through the opening. I just pushed a stylus inside the ornament and smoothed the photo from the back. it worked great!
You will also want to add names, ages, and the year to the back of the photos before you put them inside. Time has a way of blurring those details!


1 comments:
Seriously, Christa, is there anything you DON'T think of????? Enjoying your "Christmas on a budget" theme.
Post a Comment