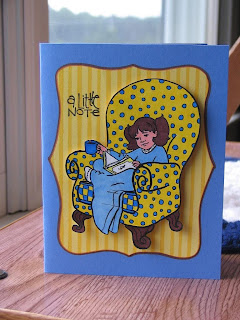
Are you tired of my free digital image cards yet? I hope not, because I'm certainly not! :)
I've had these images colored, cut and glittered for a few weeks now. (I like to keep a few images ready to color at all times. It's a great way to spend the few minutes waiting for pasta to boil!) They were laying on my craft table to see if inspiration would strike, and it finally did.
You can find the shell clip art here.
This card uses the Mojo Monday sketch from week #71. I used more of my hat pins!
Supplies: doily (Dollar Tree), patterned paper (large paper pad from Big Lots), seashell beads (Michaels $1 bins), ribbon (Big Lots), sentiment (Cloud 9 Designs), homemade hat pin.
I made this one primarily to try out a new border punch someone had given me. I liked how it turned out!
Supplies: border punch (Fiskars), patterned paper (large pad from Big Lots), ribbon (Big Lots), homemade hat pin
Here are a few more of the Magnolia Tilda images an online friend sent me to play with. All three are pretty much the same, except for the coloring.
Notice that I used my faux hat pins on them? I colored the yellow and blue beads with my BIC markers. You can't tell, can you? They look like I bought them in that color.
I've had these fancy frames sitting around for months. I made a bunch at a friend's house one time and then I didn't know what to do with them. So I just set them aside, knowing they'd be perfect for something! Becca has a tutorial here on how to make the frames. (Isn't she a genius?)
Can you see that I "sealed" the pointy end of the faux hat pins with a bead? I used Aleene's version of Crystal Effects to keep it on solidly.
The cards aren't overly fancy in layout, but these girls are so cute they don't require much!
I bought these digi stamps a few weeks ago because (1) they were so cute and a great price and (2) all proceeds go to the Make A Wish Foundation in honor of Ethan Weiman, a little boy who passed away in May with cancer. You can still buy these stamps here, and there's more information about Ethan there, too.
These are some of my favorite kid stamps in a long time! I made about a dozen each of boy and girl birthday cards already (same design - I like to mass produce).
Here's the boy version:
Supplies: paper (Making Memories, DCWV), digi stamp (Weiman Wranglers by Pink Cat Studio), stamps (Studio G clear $1 stamps), shape cutter (Creative Memories CCS star template).
And here's the girl version:
Supplies: paper (Making Memories, unknown large paper pad from Big Lots), digi stamp (Weiman Wranglers by Pink Cat Studio), stamps (clear Studio G $1 sets), shape cutter (Creative Memories CCS star template).
Originally the kids were holding balloons, but I didn't want the hassle of cutting out the balloon strings (since I was popping them up), so I just cut that off and made it look like they're waving "howdy". :)
If you're enjoying free digi stamps as much as I am, I thought I'd bring a few designers to your attention. Both of these designers offer free images on their blogs. All you have to do is e-mail them. Of course, if you like the freebies, you can check out their other images and help to support them. I like supporting generous people! :) (And digi images are so much more affordable than regular ones, even though they have their limitations.)
The first designer is Paper Tree Design. You can find her blog here. She has a gorgeous chandelier digi stamp that she's offering right now. You can find her card featuring it on Splitcoaststampers here. (I just downloaded it last night, so I haven't gotten a chance to make a card with it yet.) All you have to do is e-mail her asking for the file!
The second one is called Sunshine's Stamps. You can find her blog here. She has some cute vehicle images that she's offering right now. (These would make great boy birthday cards!) You can find some cards featuring them on Splitcoaststampers: Malcolm Milk Truck, Angus Argus, Lenny Loader, and Patrick Police Car. Again, all you have to do is e-mail her requesting the digi images.
Aren't these ladies generous?? Let me know if you make any cards with them!
I love border punches, but I'm pretty picky about them. Not just any design will make its way into my craft room. I fell in love with the EK Success fleur de lis border punch that just came out a few months ago, though, and I had to have it.
Once I got it home, I thought perhaps I should buy the coordinating fleur de lis (non-border) punch to go with it since I was using it all the time. But then I realized I have a mini non-border fleur de lis punch built right in - in what I would usually just throw in the trash! So sometimes I save those cutouts and use them on the card. It saved me the price of another punch!
But then I read on someone's blog (sorry, I can't remember who or when) that they used their border punch like a corner punch to make decorative designs on the corners. So I decided to try it with my favorite fleur de lis border punch and see what it looked like. Here it is:
What do you think? Pretty, isn't it? I was thrilled because now my $7.50 (with a coupon) border punch can do triple duty as a border punch, a regular punch (to use for cutouts), and a corner punch! And what's even better yet, they all coordinate perfectly. So how in the world do you do it? Check it out:
Turn your border punch over and line up your paper in the middle of the design, making sure you're getting the whole corner. Then just punch it out!
Here's how the card turned out, using the corner punch as well as green punch-outs:
I based it on Mojo Monday Sketch challenge 70. The flower is a free digital image I got from the Dover sampler awhile back, and the round stamp is from a Studio G clear $1 set. The patterned paper is Making Memories, cardstock is from The Paper Company, and the card base is a 5x7" Hot Hues card from a set I picked up at Goodwill a few years (!) ago.
I worked with a new digital image (clip art) on Saturday. I downloaded this eagle from Fun Draw here. My husband is crazy about eagles, so I decided to see what I could make with this wonderfully high-quality (yet free) image. I was impressed!
First of all, I made a birthday card. Then I made a "thinking of you" type card. You'll see them both featured below.
I tried coloring the first time with my BIC markers, but they're a bit too strong for this project. The feathers became one huge mass of black. So I remembered reading somewhere that you can blend colored pencils with baby oil, and I decided to try it. Let me show you the results ...
Here is the image as I it started out colored with regular old Crayola colored pencils (a back-to-school special last year for $0.15/pack).
Here you can see the difference after I started blended with the baby oil. The one on the left is how it looked right after I used the colored pencils. The one on the right has had his back feathers blended, but not the branch. I wish you could see it in person because it's almost like magic when you swipe that baby oil over it!
Here's a finished closeup where you can see a little better that there are no pencil lines and it blended my shading perfectly. I'm certainly not a colored pencil artist, or a shading expert, but this turned out better than my wildest dreams! (NOTE: I did use my BIC markers on his claws and beak.)
Of course, I made a card with it. In fact, I made four of these and one birthday card:
I used my Cuttlebug die cut apart to make the decorative flourishes framing the image. This doesn't need a lot of fancying up. I liked it just how it was!
Now, for a few tips on blending with baby oil ...
First of all, don't soak your paper with the oil. It will leech out from the image and create an oily halo around it. Make some homemade blending stumps, dip them lightly in the oil, and tap off as much as possible before using them on your image. You don't want to see oil leeching through to the back of the paper when you're done. If you do, you've used too much oil.
Secondly, it's really easy to get shading with this technique. I just used a darker shade (or pressed harder with the pencil, depending on the color) and drew a line where shadows would be. Nothing fancy, almost no thinking involved (except to remember where your light source is coming from). Then, as you're applying the baby oil, "pull" that darker color out to mix with the lighter color. It's really easy, and you'll probably end up doing it without even realizing it!
You couldn't ask for a more frugal coloring alternative. It's even cheaper than BIC markers! :) I doubt there's a house anywhere that has children and no colored pencils. And how cheap is baby oil? I've had the same bottle sitting in my cabinet since before my oldest child was born 5+ years ago, and I had only used about 1/4 of the bottle in that time period. Besides, this doesn't use much oil at all.
So, there you have it - another technique that I've added to my frugal arsenal. It was lots of fun!! If you try it, let me know what you think!
This is late (again), but I fell asleep putting my daughter to sleep. I woke up with a terrible ache in my knee, and now I can't sleep. So while I'm waiting for the pain medicine to kick in, I'm posting what I had intended to post hours ago. :)
Remember the other day I mentioned that I was playing around with a few of my Cuttlebug dies? Well, this is the other cool thing I discovered.
First of all, let me tell you that I was inspired by this card from Becca. (Yes, she inspires me a lot!) Isn't that chipboard frame totally awesome?? Well, unfortunately, I don't have anything like it ... at least I didn't think I did. But after cutting a die cut down the middle, look at my experiment:
Hmmm ... that's a good substitute! But wait - it gets better! Just trim the tiny piece off each end of the swirl. Here's what that looks like, along with the die I used:
Since that was just an experiment and certainly not card-ready (notice the two-tone frame?), here are two cards I made using the idea:
An online friend sent me some Magnolia Tilda images. Isn't she cute?? She's smaller than I had thought, but just as cute. I used the cut-apart die cut just on the top and bottom of these two cards. You could easily use it just on the sides, depending on which direction your card was oriented (horizontal or vertical).
I also used a circle frame medallion as a "frame" for her to sit on. If you click on the card to see it larger, you might notice the tiny seed beads I glued around the edges. It's not for the faint of heart - you need good eyes, precision-tipped tweezers, and good glue. But since it looks a lot like those expensive flat-back pearls I love but don't have, I figured it was worth it ... another "use what I have" alternative. :)
And here's the second card, very much like the first one but with different colors and a different punch on the circle frame. I'll post more about this particular circle frame another day ...
I intentionally left these cards without a sentiment. That way, when I need a card (like "Congratulations" or "Good Job" or "Happy Birthday"), I can just add an appropriate sentiment and send them off. It makes them a bit more versatile. And, as you know, I'm all about versatility! ;)
I know I said I was going to feature that other Cuttlebug project today, but please allow me to interrupt and show you the faux hat pins I made today! :) I've admired the hat pins everyone is putting on their cards lately. They're so Victorian, and that's definitely my style. But I wasn't willing to put out a lot of money for them, so I put that idea on the backburner.
Then I saw that Lindsay featured them on her blog the other day, and she used eye pins like I had seen at Dollar Tree and wondered about. Suddenly I had a frugal alternative! So today when I found a new load of beads at the Dollar Tree, I picked up a few packs to make some hat pins. I had so much fun with these, and I couldn't wait to share them with you! Now I can't wait to make some cards to put them on ...
I couldn't get a good picture of this first set, but let me tell you how I layered everything: bead cap, clear bead, sea-themed bead, clear bead, and bead cap. They're quite pretty when you see them from the right angle! The sea-themed plastic beads came from Michaels a little while ago when they were on clearance for $0.50/pack (around 100/pack, if I remember correctly).
This isn't as close-up, but I think you can see them alright. I didn't use the bead caps on these. There are two of each kind of sea-themed bead because I made a variation of each to see which one I liked better. One of them has 1 (or 2) clear beads, the sea-themed bead, and another 1 (or 2) clear beads. The second variation has 2 blue seed beads, 1 clear bead, 1 sea-themed bead, 1 clear bead, and 2 blue seed beads. I still don't know which one I like better!
Here's a closer picture of the end of that line-up.
And then these use the dark pink pearly beads I picked up today. I used a variety of seed beads, clear beads and pearly beads in a variety of combinations. At the far right, you can see that I even used a button with a small shank on it! (I turned the last one over so you can see how it attaches.)
Can you tell I was having lots of fun with these? I think I made about 25 of these today!
I forget where I read it, but I used a small drop of hot glue at the end of the beads to keep them in place. It worked wonderfully!
Oh, and before I forget, those clear beads color beautifully with my BIC markers!
I was playing around with some Cuttlebug dies today, trying to "think outside the box".
Ever since I saw the new releases from Spellbinders, I've been admiring the detailed, lacy look of the Fleur De Lis Pendants. Becca has been inspiring me even more with cards like this and this. But $25 (plus shipping!) for a few small dies isn't in my budget right now, and besides, why not try to use what I already had? It just makes sense!
So here is what I came up with. I thought it was an acceptable substitute, considering the fact that I had to pay absolutely nothing for it. :) I just love the lacy, intricate look!
I used one of my small Cuttlebug dies. I think it's called Antique Corners, but don't quote me on that. I'm sure you recognize it because it's widely available (even at Michaels).
I cut four of the corners and centered them over an extra-strong glue dot (by DAP, found at Ollie's). I liked it!! Then I got to wondering how it would look with another layer ...
So I did another layer exactly the same way, then peeled it off the backing and attached it right over top of the first one, making sure the points "filled in" where the previous ones weren't. I really, really liked it now! (Finished size: 2-1/2" diameter.)
The hardest part is peeling it off the backing, which is why I recommend a super-strong glue dot. I fiddled with it just a little bit, and it came off beautifully.
I've already been playing around with uses for it, which I'll share some other day. I also played around with another Cuttlebug die, and I like the results of that, too! I'll share more tomorrow.
I've had this gift done for awhile now, but I realized as I was cleaning out my folder of projects to share that I haven't featured it on my blog yet. So I will today! :)
I think everyone has a hard time figuring out what to give teenaged boys, especially when you don't have the money to just get them a gift card to their favorite store. Well, recently one of the young men in my Sunday school class turned 16. I had to come up with a gift at the last minute, and this is what resulted. He seemed very pleased, and was extremely surprised that I had made the packaging.
Here is the box closed ...
And here it is opened.
It fit 6 regular-sized Reese's peanut butter cups inside, which I just happened to have on hand.
I'm sure you won't be surprised when I tell you I recycled the bottom of a check storage box for the slide-out portion. It was actually my husband's great idea. The church checks had just come and had all these extra box bottoms. He offered them to me to see what I could make with them. They certainly made this project a lot easier!
All I had to do was measure the dimensions of the box and cut, score and fold a cover. Then I created my "tag" with a Tim Holtz rubber stamp (the truck), a Cloud 9 Designs sentiment, and blue pigment ink. I added industrial-looking snap-together grommets (I think that's what they're called) and tied a raffia bow through them.
I really like how it turned out!
I've finished a bunch of cards with some new images I haven't shared before, so I thought I'd share them with you today.
For the first and second cards, I used a series of four images I got from the Digital Two for Tuesday blog here and here. I made all four cards in each set identical, except for the image. So I'm highlighting one card from each set.
Details: paper (Making Memories), image (Digital Two for Tuesday blog), coloring (BIC Mark-Its), corners (CB Antique Corners??), rhinestones (Dollar Tree).
As you can see, I love this keyhole cutout, which is very similar to a Nestability shape. I got it from Mel's blog here. I love her blog - she's so generous in sharing her ideas and many of her images!
This next card is very similar, except I used some of that soda can metal I flattened the other day:
Details: digital image (Digital Two for Tuesday blog), paper (embossed soda can, M's brand black), coloring (BIC Mark-Its), corners (CB Antique Corners??), rhinestones (Dollar Tree).
Before I forget, let me mention that I colored these rhinestones to match with my BIC markers. I learned that trick from Lauren. They were originally clear/silver. I just colored over them with the same marker I used on my image, and they dried almost instantly. This is great because you can buy the "plain" colors and custom-color them to match!
And this last one uses a free digital image from Mel's blog here.
Details: paper (Making Memories, M's brand), digital image (from M McCarthy), fleur de lis lace punch (EK Success), flower (Prima), buttons (SEI).
I made this for a friend who likes to sew. I thought it suited her well. :)
You know I love to save money, and some of that includes recycling. I'm no environmentalist, and I certainly don't worship nature, but a certain amount of recycling just makes sense.
So you know I love using aluminum soda cans to make embellishments with my Cuttlebug, right? Well, I quit collecting them after I realized what a pain it was to store those rolled-up pieces of sharp metal, not to mention how hard it was to get them to stay in place on my die. But my husband has been hanging onto about 30 cans, just waiting to get them to the recycling center, so I decided I'd better do some recycling of my own before they decompose right in my utility room. :) And wouldn't you know, I just found out there is a way to uncurl those cans so you can store them flat!
Check out the video tutorial here on how to flatten them out in to time! He also shows a card and scrapbook project made with some of the soda can metal.
I was afraid it might transfer some of the ink from the can onto my iron, so I used my spare one just in case. But it didn't! I did notice a tiny amount of color on my towel afterward (where the edges of the cans rested), so try using a dark towel so it won't matter. I ironed about 30 of them, so if you're only doing one or two it might not be an issue at all.
Of course, I'll probably have our next evangelist use my iron and it will transfer "Diet Coke" onto his best white shirt just to prove me wrong! :)
I had read about this deal over on Splitcoaststampers, but I really didn't think I was going to find it at my Michaels.
It seems that Michaels is trying to get rid of certain Sizzix items, even if it means they have to practically give them away! They are clearancing ALL of the Sizzix Sizzlits alphabet sets for $9.97 each. Yes, you read that right - a few pennies shy of ten dollars! I have paid $15 each for two of these same sets used, and I considered that a good price.
These are the same sets that have been on clearance for $69.99 now for months. The ones that were $149.99 regular price. They are complete alphabets: uppercase, lowercase, numbers and punctuation. Most of them are close to 1" tall, which is perfect for scrapbooking and some cardmaking.
If you go, don't just look at the packaging. Make sure you find a sign somewhere that tells you they're going for $9.97. As you can see, the box was still marked with the $69.99 price tag, but they rang up at $9.97.
My store still had gobs of them tonight, but I wasn't taking any chances. I probably spent a half hour looking over each package, deciding what I would really use. I ended up with two of them for myself and one for a friend:
I bought Endless Love and Alpha Bubbles. I can't wait to use them! :)
Just a heads-up on some other items, too. My Michaels store was pretty cleaned out of the aisle of K & Company scrapbooking items, but you might get lucky and they might have more. There was an entire aisle of K & Company scrapbooks, papers and embellishments at rock-bottom prices. The embellishments weren't the steal that the albums and papers were, though. There were $29.99 albums for $4.99 (12x12" size, no less). There were also $14.99 paper pads for $4.99.
Let me know if you find any good deals! :)
I've had these cards made for a few weeks already. I thought I had posted them here, but I checked and discovered that I hadn't. Since I always like to pass along frugal ideas, especially for expensive hobbies like cardmaking, I figured I'd show you some more cards made with some online freebies. :)
I love this buggy! You can find it here. Browse through the whole site because there are lots of cute ones there!
This one was a free coloring page from the talented Elizabeth O. Dulemba, the children's author/illustrator. Check out her books here. You can find many of her free coloring pages under "Freebies". She's generously offering the use of her coloring pages for cards (personal use only), so long as we credit her for the images. After all, as she pointed out, she's in the business of selling children's books, not digistamps. The best way to support her is to buy her children's books. :)
This is another of Elizabeth O. Dulemba's free coloring pages. (See the link above.) I strung the plastic beads along a piece of embroidery floss (taped on the back). They hang freely to give some interesting motion to the card.
This is another image from Arthur's Clip Art Site here. I added some lines to indicate siding and windowpanes, since the house is a bit plain without it. This is one of the crocheted flowers I made a few weeks ago and a charm from Dollar Tree to decorate the middle.
I've been trying to find a good way to organize my wood-mounted rubber stamps for awhile now. I considered unmounting them all, but I wasn't quite ready to take that plunge. What I really wanted was a way to display my rubber stamps like the stores do it - on shelves so you can easily see what's there (and easily reach it).
I had made a temporary shelving unit out of a lid of copy paper, but since I've found some great deals on stamps, and had some given to me, I've outgrown that little unit.
Then I ran across this idea on Splitcoaststampers. I had read about it months ago, but the time wasn't right. Now it is, but I have no idea who to credit for this wonderful idea.
All I did was buy 8 feet of moulding from Lowes for around $3. I had them cut it into 2-foot lengths for me, since I was working with a smaller amount of space (and stamps). Then I just used three nails on each strip, and they were done! Seriously, this is one of the easiest DIY projects ever.
And here's a (blurry) closeup of the stamps resting on the ledge it creates. I put them next to my bookcases, so that's what you see poking into the picture near the bottom.
If you do this, you might want to pay attention to the width of the moulding you're buying. Mine (11/16") was a tad too small to fit the clamshell boxes from the Stampin Up complete sets. That's okay, though, because I think I prefer having those stacked on a shelf instead.
I really like my new storage, and my husband was really impressed that I was able to do it myself! :)
I've been feeling a bit sick the last few days, so that's why I've not been posting. Fortunately, it's not the "go to bed because I'm so sick I can't keep food down" kind of sickness. I'm still feeling quite tired and weak most of the day, but at least I have a little energy today!
I had this idea running through my head for a few days now, so I decided to try it out. Papertrey Ink has a neat idea about using grids to design your own patterned paper. They sell stamp sets and even paper with the grid designs printed on them. It's a really great idea, but you don't need their products to get the same effect. (However, be prepared to fall in love with their stamps if you visit their site!!)
First of all, I need to tell you that I copied the overall design of these cards from Julia Aston because I thought they were so cute that I had to make some. I'll show you the cards and then explain how easy it is to get this effect.
Here is the pink version ...
... the orange version ...
... and the turquoise version.
To design my grid, I measured the stamps I wanted to use. They were 1-7/8" square.
I opened Microsoft Word, adjusted my margins as small as I could, and inserted a table. Then I adjusted the column height and width to 1-7/8" and made sure I had enough columns and rows to fill out the page. Then I adjusted the color of the table's borders to 25% grey. That color gives you a guideline without being too overpowering. All I had to do then was print and stamp!
These stamps are actually snowflake stamps. Could you tell before I told you? I chose a set of 6 that I got at Wal-Mart on clearance after Christmas, and I chose the 3 that looked the least like snowflakes. I stamped them in three different colors (thanks to all my new inkpads!), and then added the small stamp in the corners of each square. The small stamp came from another small set I got on clearance at Wal-Mart after Christmas, and it was also supposed to be a snowflake.
Then I cut apart my paper and made these cards, which are pretty self-explanatory just looking at them.
Notice the cute faux stitching around the edges? I love the look of stitching, but I'm not going to pull out my big sewing machine to sew on a card! So I bought this template from Paper Pizazz. It's called Easy Stitches, and you just trace the stitches with your pen. It looks very convincing! :)
I also discovered that my Creative Memories fancy corner rounder can be a little versatile after all. Those sentiment tags are just 3/4" strips of paper that I used the corner rounder on (all 4 sides). I love the look of them, and considered buying a Cuttlebug die just like this. Now I don't have to.
And just one more thing before I sign off ... Did you notice my card pictures look different? I took another lady's advice and bought a little science fair project board. I got mine at Ollie's for less than $0.50. Then I just leaned coordinating paper against the back and at the bottom, added the card, and took the picture. No more distracting backgrounds! Here's a picture of the project board I got:
Now that I've written enough to make up for the last few days, I'll sign off.
Cousin Camp details will be coming soon!
Subscribe to:
Posts (Atom)