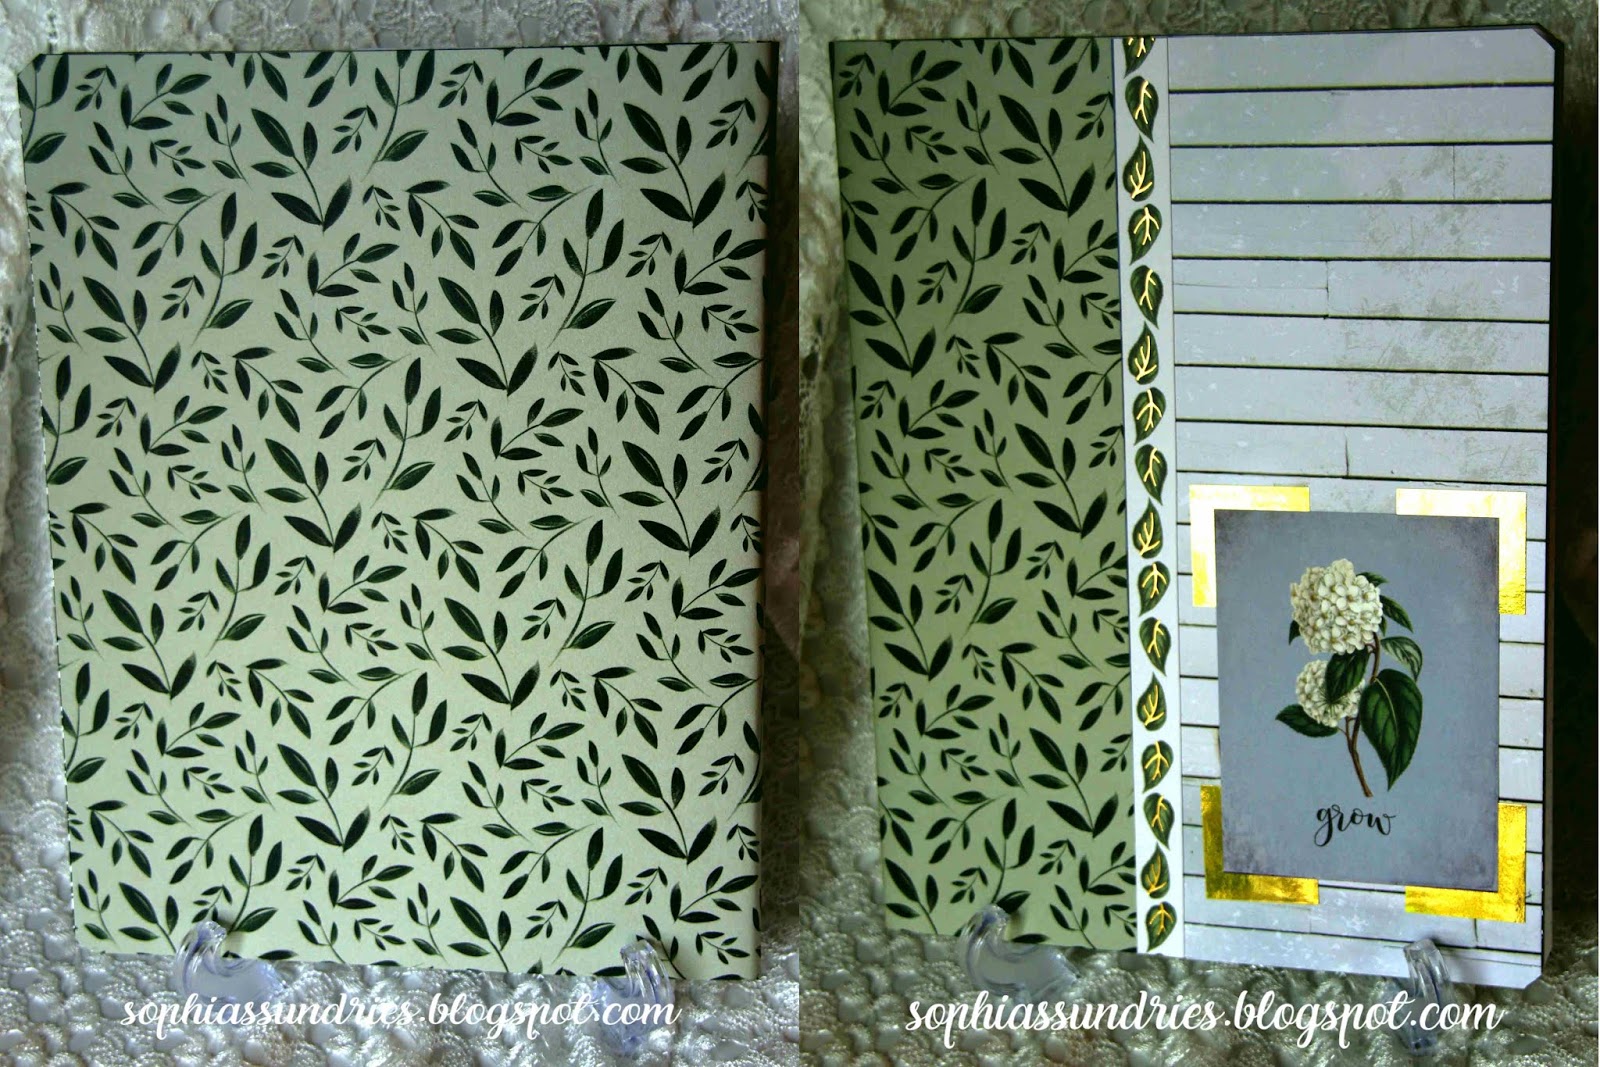
You may have noticed that I've been papercrafting again lately. I've especially been enjoying altering composition books. As I looked at other people's ideas online, I noticed that some of them were adding sections to theirs. I like the idea, since I always liked 3-subject notebooks. So I decided to take a book I had already altered and add some tabs and sections to it.
This is the book I started with:
I gathered my supplies, mostly from the same paper pad that I originally used to make this one. It was a Hot Buy paper pad from Michaels.
I added in a few sheets of plain white cardstock, as well as a Spellbinders file folder tab die.
I used almost every scrap of the two decorative papers. I tried a few methods of making these sections and liked this one the best, since it only uses two of the fancy papers from the paper pad (which makes it stretch further).
This is the first section. I backed it with a piece of plain white cardstock to hide the lines on the back of the page, as well as giving it more stability.
For this divider, I used the rest of the decorative paper that I cut off when I made the first divider page. Then I added in a decorative strip from the paper pad that looks like a ribbon. That still left some room along the side, so I filled it in with some plain cream cardstock.
This is the third tab. The paper is foiled, so it's very pretty.
This is the fourth and last tab. I designed it the same as the second tab, just with a different paper (cut from the second sheet of patterned paper).
And this is what the tabs look like when the book is closed.
I've done several this way, and I really like the result. I hope this helps someone else. Let me know if you try it. I'd love to see yours!
Today I thought I'd share my fall home decor before the season is over.
I mostly decorate seasonally in my living room and dining room. We'll start in the living room, since that's the first room you see when you walk in my front door.
This is an end table arrangement. The sign and mini pumpkins came from Dollar Tree this year.
I made the sunflower balls last year with Dollar Tree supplies. Last year, they hung on my porch. This year, I decided to bring them inside instead.
The glass vase/jar was a $1 yard sale find, the doily was a yard sale find ages ago, and the candle was from last year's fall clearance at Dollar General.
As a side note, I've been pretty happy with the throw of the three-wick Dollar General candles. The one-wick versions have been disappointing, but these candles smell amazing.
This is the other end table arrangement with a different Dollar Tree sign and a different yard sale doily underneath. The end tables are on either side of my sofa.
Next up is my coffee table arrangement. I made the "lantern" from Dollar Tree frames and some black foamboard (also from Dollar Tree). The top of it isn't as convincing as the bottom of it, so I'd leave it off if I were to make it again. But the loop of flowers helps to hide the worst of it.
I made the pumpkin jar (far right) last year for a ladies' meeting craft. After we did it, I found the idea on Pinterest, too. Apparently I wasn't the only one that thought of a pumpkin when I saw that jar!
My coasters are made to hold pictures (behind glass), but I prefer to swap out appropriately-colored scrapbook paper for the seasons.
The tassels came in a Michaels $4 grab bag a month or so ago. They were supposed to be summer-themed, but I thought they worked quite well with my fall decor.
Everything else was a yard sale find.
We have a bay window in the living room, and I like to put something pretty there. This was made entirely with yard sale finds. I added a few florals to the cornucopia, since it really needed more fullness. It's not perfect, but it works!
I'm pretty sure this crocheted runner is from my great-grandmother. If not, it looks exactly like hers (which I may have tucked away in my hope chest if this isn't hers). I tend to pick up crocheted doilies when I find them cheap at yard sales. I do crochet and love a good doily now and then, but old ones have a lot of character.
You've seen a tiny bit of my mantel already, but here's the full arrangement.
I did switch out the wreath, since I liked the colors of this one better with my arrangement. My daughter wanted a fall wreath for her bedroom door, so she got the one I originally had here. I made this wreath last year with two yard sale leaf swags attached to a wire wreath form (Dollar Tree) and three mini pumpkins from Dollar Tree.
I made the faux window frame from Dollar Tree mirrors. You can read more about it here.
I found the little truck framed print a few months ago at Dollar Tree and just had to have it. I really do like the "little red truck" items. There's something about the shape of the truck that I really like. Anyway, this was a way to bring it into my fall decor.
I made the pumpkin apothecary jars from old Home Interior candle jars and candlesticks (all yard sale finds - a whole box for $1). You can read more about those here. I filled them with miscellaneous jar filler that I picked up at Dollar Tree last year.
The candlesticks, crocheted runner, and swag were all yard sale finds. (Yes, there is a theme here. It's called, "I'mcheap frugal.")
I have a combination buffet/china cabinet next to our dining room table, and I've started to switch out the display seasonally. I've never owned a matching table and buffet before, so I'm enjoying this set. I know this wood stain and style are out of vogue. Most people would have painted it white and distressed it. However, I'm 41 and don't follow all the home decorating fads out there. I know what I like, and I keep it that way until I no longer like it. My home is about pleasing my family, not Pinterest.
Anyway ... The signs were all from Dollar Tree. They had some nice ones this year, but they sold out fast. I happened to be in the store when they unpacked these or I wouldn't have gotten them. They were gone when I went back a day or so later.
The lanterns were yard sale finds. One was $1 (on the left - flameless candle inside), one was $0.75 (on the right).
I have no idea where I got the pumpkins and sunflowers. I don't remember buying them, but they appeared with the rest of my fall decor when my husband and son brought my decorations down from the attic. One of us must have picked them up at a yard sale or thrift store last year. They're quite realistic, and I like them a lot.
Lastly, this is our dining table. In our previous house, I had a formal cherry dining table with intricate carving (a gift from our last church family). My kids were very young then, so I mostly protected it with a tablecloth. I wish now that I had enjoyed the look of the table and pulled the cloth off now and then. Oh well, it was pretty, even with a cloth on it.
Maybe that's why I've resisted adding a tablecloth to this table. I like the wood finish, and I like that the grain is decorative. I may add a runner at some point - maybe next year, if I can make or find one after the season is over this year.
My husband picked up these elegant placemats at the thrift store, along with a bunch of other nice ones that I'll be switching out seasonally. Up to this point, I've not been much of a placemat person. We rarely used them growing up. However, my sister-in-law really likes them, and I learned from her that they can add a lot to the look of a table, even when you're not eating.
I bought these gold chargers from Dollar Tree this year. They stay at the table to make it look a bit more polished between meals, and then we just add our regular dining plates on top of them at mealtime.
I don't remember where the big pumpkin in the middle came from. It was in the same bag as the other mystery fall decorations. However, I do know about the knitted white pumpkins because I made them. I thought I had posted about them on the blog, but apparently I didn't. If you knit, they're fast and easy. I used this free pattern from Ravelry and tweaked it just a bit after reading how others had modified theirs. You can read my notes on Ravelry here, if you'd like to make one yourself.
Well, that wraps up my fall decorations. I hope you enjoyed looking at them as much as I enjoyed creating them!
I mostly decorate seasonally in my living room and dining room. We'll start in the living room, since that's the first room you see when you walk in my front door.
This is an end table arrangement. The sign and mini pumpkins came from Dollar Tree this year.
I made the sunflower balls last year with Dollar Tree supplies. Last year, they hung on my porch. This year, I decided to bring them inside instead.
The glass vase/jar was a $1 yard sale find, the doily was a yard sale find ages ago, and the candle was from last year's fall clearance at Dollar General.
As a side note, I've been pretty happy with the throw of the three-wick Dollar General candles. The one-wick versions have been disappointing, but these candles smell amazing.
This is the other end table arrangement with a different Dollar Tree sign and a different yard sale doily underneath. The end tables are on either side of my sofa.
Next up is my coffee table arrangement. I made the "lantern" from Dollar Tree frames and some black foamboard (also from Dollar Tree). The top of it isn't as convincing as the bottom of it, so I'd leave it off if I were to make it again. But the loop of flowers helps to hide the worst of it.
I made the pumpkin jar (far right) last year for a ladies' meeting craft. After we did it, I found the idea on Pinterest, too. Apparently I wasn't the only one that thought of a pumpkin when I saw that jar!
My coasters are made to hold pictures (behind glass), but I prefer to swap out appropriately-colored scrapbook paper for the seasons.
The tassels came in a Michaels $4 grab bag a month or so ago. They were supposed to be summer-themed, but I thought they worked quite well with my fall decor.
Everything else was a yard sale find.
We have a bay window in the living room, and I like to put something pretty there. This was made entirely with yard sale finds. I added a few florals to the cornucopia, since it really needed more fullness. It's not perfect, but it works!
I'm pretty sure this crocheted runner is from my great-grandmother. If not, it looks exactly like hers (which I may have tucked away in my hope chest if this isn't hers). I tend to pick up crocheted doilies when I find them cheap at yard sales. I do crochet and love a good doily now and then, but old ones have a lot of character.
You've seen a tiny bit of my mantel already, but here's the full arrangement.
I did switch out the wreath, since I liked the colors of this one better with my arrangement. My daughter wanted a fall wreath for her bedroom door, so she got the one I originally had here. I made this wreath last year with two yard sale leaf swags attached to a wire wreath form (Dollar Tree) and three mini pumpkins from Dollar Tree.
I made the faux window frame from Dollar Tree mirrors. You can read more about it here.
I found the little truck framed print a few months ago at Dollar Tree and just had to have it. I really do like the "little red truck" items. There's something about the shape of the truck that I really like. Anyway, this was a way to bring it into my fall decor.
I made the pumpkin apothecary jars from old Home Interior candle jars and candlesticks (all yard sale finds - a whole box for $1). You can read more about those here. I filled them with miscellaneous jar filler that I picked up at Dollar Tree last year.
The candlesticks, crocheted runner, and swag were all yard sale finds. (Yes, there is a theme here. It's called, "I'm
I have a combination buffet/china cabinet next to our dining room table, and I've started to switch out the display seasonally. I've never owned a matching table and buffet before, so I'm enjoying this set. I know this wood stain and style are out of vogue. Most people would have painted it white and distressed it. However, I'm 41 and don't follow all the home decorating fads out there. I know what I like, and I keep it that way until I no longer like it. My home is about pleasing my family, not Pinterest.
Anyway ... The signs were all from Dollar Tree. They had some nice ones this year, but they sold out fast. I happened to be in the store when they unpacked these or I wouldn't have gotten them. They were gone when I went back a day or so later.
The lanterns were yard sale finds. One was $1 (on the left - flameless candle inside), one was $0.75 (on the right).
I have no idea where I got the pumpkins and sunflowers. I don't remember buying them, but they appeared with the rest of my fall decor when my husband and son brought my decorations down from the attic. One of us must have picked them up at a yard sale or thrift store last year. They're quite realistic, and I like them a lot.
Lastly, this is our dining table. In our previous house, I had a formal cherry dining table with intricate carving (a gift from our last church family). My kids were very young then, so I mostly protected it with a tablecloth. I wish now that I had enjoyed the look of the table and pulled the cloth off now and then. Oh well, it was pretty, even with a cloth on it.
Maybe that's why I've resisted adding a tablecloth to this table. I like the wood finish, and I like that the grain is decorative. I may add a runner at some point - maybe next year, if I can make or find one after the season is over this year.
My husband picked up these elegant placemats at the thrift store, along with a bunch of other nice ones that I'll be switching out seasonally. Up to this point, I've not been much of a placemat person. We rarely used them growing up. However, my sister-in-law really likes them, and I learned from her that they can add a lot to the look of a table, even when you're not eating.
I bought these gold chargers from Dollar Tree this year. They stay at the table to make it look a bit more polished between meals, and then we just add our regular dining plates on top of them at mealtime.
I don't remember where the big pumpkin in the middle came from. It was in the same bag as the other mystery fall decorations. However, I do know about the knitted white pumpkins because I made them. I thought I had posted about them on the blog, but apparently I didn't. If you knit, they're fast and easy. I used this free pattern from Ravelry and tweaked it just a bit after reading how others had modified theirs. You can read my notes on Ravelry here, if you'd like to make one yourself.
Well, that wraps up my fall decorations. I hope you enjoyed looking at them as much as I enjoyed creating them!
I searched high and low for a Thanksgiving theme for my November bullet journal layout, but I couldn't find any that clicked with me. So I hit up all the craft stores and dollar stores in search of fall-looking embellishments that I could use. This is what I ended up with - $4 worth of new supplies from JoAnn Fabrics & Crafts. (Also pictured: markers, a pen and a washi tape roll that I already had on hand.)
I laughed out loud when I saw several YouTubers choosing a woodland theme the week after I had designed this. (I designed it early, since I knew this week would be busy.) It would have saved me a lot of time if they had released their videos sooner - or I had simply waited a few more days. Oh well, this is now my original design, which is just fine since a bullet journal is a design-your-own planner anyway.
I used the (6x6") woodland animals paper for my cover page and then simply lettered the month into the middle. It's tricky to get just the right size of letters for me and my Tombows. This was a bit large for me, probably because I have child-sized hands. I'll file that away in my memory bank for the future.
I changed up my monthly layout because I'm working on getting back in shape starting this month, and I have more that I need to track as a result. It was just a little too much for my previous monthly design. I really like the fact that the calendar doesn't split over the two pages, since that makes it hard to write neatly.
As you can see, I already started filling in a few trackers. I didn't get a chance to take pictures before I needed to start using it. As a side note for those of you who know me and are concerned that I'm tracking my weight, let me assure you that I'm not anorexic and will not be starving myself. I'm just curious how getting back in shape will affect my weight. I'm only recording the results once a week, so I listed the dates to help me remember.
The top header is paper from the fox and mushroom paper. (I used the foxes elsewhere.) The bottom washi tape is one that I already had on hand from a washi tape color-themed tube.
This is my first weekly spread. I love Dutch doors, although I accidentally cut them a bit narrow this month. I should have paid more attention. I just cut them at the half-page mark, completely forgetting that I didn't need that much space for my to-do list and menu.
I added brown gingham washi (from JoAnn Fabrics & Crafts) to the cut edge of the Dutch doors. This helps me to see it better when I need to flip it over. Otherwise, it blends in so well that I'm constantly fiddling with it to get it to turn.
The leaf washi tape was also from JoAnn Fabrics & Crafts. It came in a pack with the brown gingham and coordinated with the paper pad I bought. The sticker was a freebie I found online (from Victoria Thatcher) and printed as an experiment to see how my printer works with printable stickers. Notice that I ended up buying a paper pad and washi tape instead. My printer doesn't produce stickers with the vibrancy that I want.
I'm staggering the Dutch doors again this month, in the hopes that this will reduce the "valley" effect created by cutting Dutch doors in the same place every week.
The fox border is cut from the paper pad. The mushrooms from my monthly spread came from the same paper.
This is very similar to the last, just with the Dutch door at the top instead of the bottom.
Lastly, this is very similar to the previous side-Dutch-door layout, with the exception of a different free printable sticker (also from Victoria Thatcher).
So, what are my thoughts about using decorative paper and stickers in my bullet journal? At first, I was conflicted. I doodled last month because of the bulk that washi tape tends to create. However, I like my planner to be pretty, and I really like how this turned out. After seeing several YouTubers' bullet journals that are nearly bursting their bindings, mine seems downright thin. So I decided I'm not going to obsess about it. I'll just do what I feel like doing from month to month and enjoy the process.
Today I'm sharing more of my DIY fall decor.
I found a tutorial on YouTube for making this faux windowpane mirror. It uses frames from Dollar Tree glued together with E6000 and then glued onto the back of a piece of foamboard for stability. I changed it up just a bit by buying mirrors in a larger size and only using four of them. That put my cost right at $5.
There are so many variations you could do on these mirrors. You could paint the frames, but black matched my decor. You could also buy a fancier frame and add the mirror panels into them (effectively doubling the cost), but I liked the simple black for this project.
I added a sawtooth hanger to the back (again with E6000 - hot glue won't work), and it was ready to hang on my wall after the glue cured.
The wreath is another Dollar Tree creation. It wasn't quite as inexpensive as my $3 Dollar Tree wreath, but it wasn't expensive as wreaths go, either. I bought a wire frame, six bunches of flowers, and one pack of small pumpkin clips (all from Dollar Tree) for this project. I used a metal sentiment sign from a pack I already had (3/pack from Dollar Tree). So this project cost me $8. If you needed to buy the sentiments, it would be $9.
There is no magical formula for arranging the flowers, but I like things to be methodical. I aimed for the equivalent of one bunch of flowers for each section of the wreath. It worked perfectly for me, but it really does depend on the fullness of your flowers. I tried to mix up some of the scrawnier ones with some of the fuller ones in each section.
To attach the sentiment, I simply wired it on with some floral wire I had on hand. It doesn't take much. You could probably use a bread tie on each side with the paper bits stripped off.
I really enjoyed making these! I hope they inspire you to look for inexpensive ways to make your house look prettier, too.
You might remember that I'm a pastor's wife. One of my duties is leading our monthly ladies' meetings. Our ladies appreciate a nice craft just as much as the next person, but it's hard to find an inexpensive craft that is actually useful and adds value to our homes. I'm a firm believer in making pretty, practical, and inexpensive crafts. As you might imagine, this taxes my creativity to the limit some months.
This year, I wanted to create seasonal wreaths for our homes. Since we take the summers off and start our "year" fresh in September, the first seasonal wreath was for fall. I browsed my local Dollar Tree stores for inspiration and was not disappointed.
With the same supplies (roughly $3.33 worth - 1 wreath, the equivalent of one batch of flowers, 1 package of small pumpkin clips and one metal sentiment sign that came 3/pack), I came up with the following variations:
The pumpkin clips came in three varieties - white, orange, and red. I used all white pumpkins on this wreath.
I switched out one of the white pumpkins for an orange one on this variation.
I reversed the pumpkin color selection this time, with two orange and one white.
Then I tried all orange. This was my favorite of the pumpkin variations. Ladies with a farmhouse decorating theme (the current rage) would probably prefer white pumpkins.
After all that experimenting with the pumpkins, I started experimenting with the placement of the sentiment. This was my favorite, and we ultimately ended up making most of them just like this.
The nice thing about these wreaths is that everything just tucked into the wreath without any hot glue. We can take out the fall decorations and make a fresh arrangement any time we want.
I hope this helps someone else who may be looking for an inexpensive wreath or inexpensive ladies' meeting craft ideas!
This year, I wanted to create seasonal wreaths for our homes. Since we take the summers off and start our "year" fresh in September, the first seasonal wreath was for fall. I browsed my local Dollar Tree stores for inspiration and was not disappointed.
With the same supplies (roughly $3.33 worth - 1 wreath, the equivalent of one batch of flowers, 1 package of small pumpkin clips and one metal sentiment sign that came 3/pack), I came up with the following variations:
The pumpkin clips came in three varieties - white, orange, and red. I used all white pumpkins on this wreath.
I switched out one of the white pumpkins for an orange one on this variation.
I reversed the pumpkin color selection this time, with two orange and one white.
Then I tried all orange. This was my favorite of the pumpkin variations. Ladies with a farmhouse decorating theme (the current rage) would probably prefer white pumpkins.
After all that experimenting with the pumpkins, I started experimenting with the placement of the sentiment. This was my favorite, and we ultimately ended up making most of them just like this.
The nice thing about these wreaths is that everything just tucked into the wreath without any hot glue. We can take out the fall decorations and make a fresh arrangement any time we want.
I hope this helps someone else who may be looking for an inexpensive wreath or inexpensive ladies' meeting craft ideas!
If you know me in real life, you know that I only wear skirts and dresses, I wear my skirts and sleeves long, and I like a high neckline. Only someone else who dresses this way would understand just how difficult it is to find clothing that fits these guidelines. You might say it's about like finding a unicorn, especially when you consider the fact that I'm unwilling to pay anywhere near $100 for anything I'm not being married in. (My wedding dress - nearly 16 years ago now - was a sample gown from a California bridal shop that I picked up on Ebay for $125, shipping included.)
So you might imagine my excitement to run across an idea on Pinterest of how to easily make your own maxi dresses without having to sew them completely from scratch. I'm a fairly accomplished seamstress, but I can't say that I relish sewing a lot with silky knits, which are my absolute favorite to wear. Besides, those silky knit fabrics can be pricey. I've been spoiled for thrift store prices.
So, let me tell you about how easy this is - after I link back to A Small Snippet, the blog where I got my inspiration. The really funny thing is that I modified her idea a bit (by using premade clothes - all knit), and she modified her idea from the woman who inspired her (Talk to the Trees). This could go on endlessly ...
I had recently done a closet purge, and a few of my favorites went out with that purge. As my body changes with midlife realities, some of my formerly favorite clothes just aren't flattering on me anymore. Therefore, I didn't wear them. This allowed me to rescue a few favorites and change them so that they were flattering on my new proportions.
The basic idea is this: Cut a tee to about empire-waist length (just slightly under your bust area). Sew on a maxi skirt or the bottom of a dress (being sure to use a stretch stitch), and you have a dress! It's really that easy.
This is the first one I made. I loved the flower detail on the neckline of this top, but it irked me to always have to layer it to make it modest enough for my personal standards. Oh, and it was longer than my ideal. I'm short.
The bottom part was from a dress that had thinner stripes on the top. When I bought it at the thrift store, I thought it wouldn't bother me. In reality, I just couldn't bring myself to wear it like that. Mismatching stripes are not my personality.
The bonus part of this dress was being able to fill in the neckline of this top with what I cut off the bottom of it. I love it now!
This was my second dress. I loved this yellow top but had somehow managed to get a pink stain near the bottom of it. This allowed me to cut off the stain but still use the good part.
The skirt part came from another dress that I bought when I was a size smaller than I am now. I loved the big, bold houndstooth print and the silky knit. But I didn't like how it showed every imperfection of my new size. Raising it slightly to sit just below my bust made it flattering again. I can't tell you how happy I am to rescue this one!
You'll notice that I added a belt as an option. They fit fine without one, but I think it dresses up the look just a bit. I could really wear them either way.
This borders on life-changing. Summers don't have to be spent sweating in layers. I don't have to pay $80+ for a pretty dress (thanks to thrift stores where I can buy the tops and bottoms to sew together) - not that I would anyway.
On a side note: Did you notice that I have a dress form now? I've been sewing since I was somewhere around 13 (let's not talk about how many years that's been), and I've always wanted one. But I never wanted to spend what they cost brand-new. I picked up this one at a yard sale for less than one-third of what it's going for in the store. It's in excellent condition, and I'm enjoying the ease of sewing and mending when I don't have to personally try on all of the clothes at every step of the project.
A few weeks ago, I ran across the "lowest price of the season" sale at Michaels. I was there for something completely different, but the 12x12" paper stacks for $5 each caught my attention. I used to do a LOT of papercrafting, but I haven't done any in a long time.
There were some gorgeous paper stacks. And at $5 for 48 sheets, that's a lot of papercrafting for just a little bit of money. How could I say no? (Please don't tell me if you know how to resist this. I've enjoyed my foray back into papercrafting.)
Since it's so close to back-to-school season, I was also able to get a great deal on college-ruled composition notebooks. I've made decorative composition notebooks before, so it was a logical project for this pretty paper.
This one came mostly from the Marishka paper pad. I just added a little accent of gold foil paper along the corners.
This came entirely from the Marishka paper pad, as did the next one.
The front image on this one was a full 12x12" page. The word "love" fit onto the front of the composition notebook, so I just cut it down to size.
This is the inside of the "Love" book. I added solid cardstock inside the front and back covers of each book to hide the ugly school charts and completely disguise their humble beginnings.
All of this came from the Marishka paper pad, except for the accents of gold foil paper.
I really like the page borders that come in these paper pads. There are two whole pages of them. I just had to cut them apart.
This one came from the Grace paper pad. I added accents of gold foil paper, as I did on several of the others. The "Have Faith" sentiment was one of several 6x6" accents in the paper pad.
This one came from the Pink Champagne paper pad. I would have made a lot more with that paper pad, but I'm trying to save some for an activity for my daughter's 13th birthday party that has a black, white, pink and rose gold theme.
This was another 12x12" full page that happened to fit onto the front of my composition notebook.
I made this one from the Bless Our Home paper pad (minus the gold foil accents underneath the corners of the flower card).
This also came from the Bless Our Home paper pad. I just added a strip of matching washi tape where the two papers joined. The flower paper was a 12x12" border page. This is a perfect way to use that type of page.
This was actually the very first one I made, and it came from the Bless Our Home paper pad. The sentiment came from the bottom of a full 12x12" page. The sentiment and accents are all in gold foil, which is a little tricky to capture on camera.
There was a tree image above the sentiment, and I used it to make another notebook (up next). I thought this would be particularly neat for someone collecting genealogy information. I added gold foil paper to the insides of this one.
Lastly, this was made from the tree image leftover from the last composition notebook. Everything except the silver glittered washi tape came from the Bless Our Home paper pad.
So ... what am I going to do with all of these?
I like to give something to each of our church people for their birthday. This year, all the ladies got handknit dishcloths. (Guys got candy and will still get candy next year. They're impossible to shop for.) Next year, I plan to give each of our ladies a pretty composition book. These would make great journals, guest books, recipe books - almost anything you can think of.
Subscribe to:
Posts (Atom)


- "Join Me on Facebook!
Contact